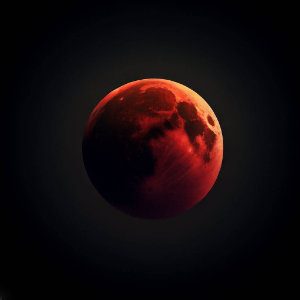
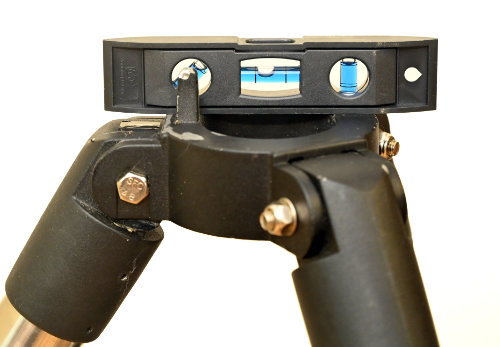
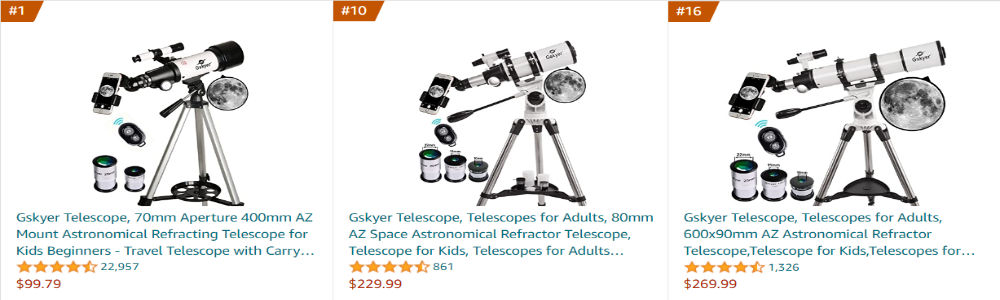
Articles

There are several different named moon events. These are often all lumped under the term Super Moon although that is
How to Clean Telescope Mirrors Safely Why worry about how to clean telescope mirrors? Keeping your astronomy equipment clean and
There are several different types of telescopes. Which is right for you? Let's take a look. Telescopes have long been
What is telescope collimation? Telescope collimation refers to the process of aligning the optical components of a telescope to ensure
As an avid stargazer and someone born in the 1960s during the great space race, I have always been fascinated
Astrophotography is a fascinating hobby that allows us to capture the beauty and vastness of the cosmos. One of the
Achieving precise polar alignment on an equatorial telescope mount is a crucial step for any stargazing enthusiast, especially when it
So why are Gskyer telescopes best sellers on Amazon? Does anyone know? Are they really good? Do they provide great
Is it possible that the Orion Astroview 90mm EQ Refractor could be a better beginner telescope than the always recommended
Astrophotography How To Part 2: Getting going In our last article, Astrophotography for Beginners Tutorial part 1, we mainly talked

Are Blood, Blue, Pink and Harvest Moons all Types of Super Moons?

There are several different named moon events. These are often all lumped under the term Super Moon although that is not necessarily the case.

What is a Blood Moon?

A blood moon

A blood moon is a term used to describe the appearance of the Moon near totality during a total lunar eclipse when it takes on a reddish or coppery color. It occurs when the Earth passes between the Sun and the Moon, causing the Earth’s shadow to fall on the Moon. During this phenomenon, the Earth’s atmosphere bends and filters sunlight, allowing only the longer red wavelengths to reach the Moon. This gives the Moon its reddish hue. The exact color and intensity of the blood moon can vary depending on atmospheric conditions such as pollution and cloud cover. Lunar eclipses are relatively rare events that can be observed in certain parts of the world.

What is a Blue Moon?

A blue moon is a term used to describe a rare occurrence of having two full moons in a single calendar month. It can also refer to the third full moon in a season that has four full moons. The term “blue moon” does not actually refer to the color of the moon. It is more about the timing of full moons.

The lunar cycle lasts about 29.5 days, which falls short of the 365/366 days in a calendar year. This misalignment causes occasional blue moons to happen, typically once every two to three years. The next monthly blue moon (as of this writing) is set to occur on August 30/31, 2023.

It’s worth noting that the moon does not appear blue in color during a blue moon. The term is more symbolic and represents a rare event rather than a literal description of the moon’s color.

What is a Pink Moon?

A pink moon refers to the full moon that occurs in April. It is named after the herb moss pink, also known as creeping phlox, which is a type of early-blooming wildflower. The name “pink moon” comes from Native American culture, where lunar phases were important for timekeeping. However, it’s important to note that the moon does not actually appear pink in color during this time. The term “pink moon” is symbolic and represents the arrival of spring and the blooming of flowers. The occurrence of a full moon is a natural event that happens when the moon is on the opposite side of the Earth from the sun, and its entire illuminated side is facing us.

What is a Harvest Moon?

A harvest moon is a full moon that occurs closest to the autumnal equinox. It usually happens in September, but occasionally falls in October. The term “harvest moon” originated from the extra light it provided for farmers to harvest their crops in the evenings before electricity was available.

Farmers harvesting under a full moon

The occurrence of a harvest moon is due to the Moon’s orbital motion and its position on the celestial sphere. During this time, the Moon rises earlier and stays visible for longer periods, providing extra light during peak harvest time. Before electric lights, this was a critical time of the year for farmers.

The harvest moon appears larger, brighter, and more orange than a regular full moon. This is due to the moon illusion, which makes the Moon appear larger when it is near the horizon. Additionally, the particles in Earth’s atmosphere can create an orange or reddish hue.

The harvest moon also coincides with the migration of birds, creating a stunning sight. It is a beautiful phenomenon that has been celebrated in art, literature, and culture.

What is a Super Moon?

A supermoon occurs when a full Moon coincides with the Moon’s closest approach to Earth in its orbit. The Moon’s orbit is not perfectly circular, so it varies in distance from about 360,000 to 400,000 kilometers from Earth. When the Moon is at its closest point, called perigee, it appears slightly larger and brighter in the sky. This phenomenon is commonly known as a supermoon.

Approximation of what a super moon would look like compared to a farthest moon.

The term “supermoon” gained popularity in recent years, although the concept has been around for a long time. It is primarily an astronomical event, but it has also gained attention in astrology. Supermoons can appear around 14% larger than a full Moon at its furthest point, but this difference is not significant to the naked eye. Additionally, the Moon may appear larger when near the horizon due to the “moon illusion.”

Throughout the year, there are several opportunities to observe supermoons. The specific dates and visibility of supermoons can vary. If you’re interested in observing supermoons, it’s a good idea to check astronomical calendars or websites for the most accurate and up-to-date information on upcoming supermoon events.

Full Moons are Not the Best Times to Observe!

While full moons can be useful to farmers, make walking outside at night easier, and be quite romantic, they are not the best time to view the moon as the moon appears as a flat, evenly lit disc, with little to no detail.

An excellent book for exploring the moon

Try it some time, get a pair of binoculars or a telescope and look at the moon when it is somewhere between 25-75% full and look at the terminator line (the line between lit and unlit sections of the moon). There you should be able to see a lot of surface details like the edges of craters. As you move away from the dark portion you will notice that the level of detail drops off.

Now if you wait until there is a full moon and try to look at the same craters you looked at earlier, you will notice that the level of detail is significantly less. The reasoning is simple, the detail you are seeing is shadows created by the light on the edge of things like the crater. Without this shadow, the surface looks much flatter and washed out.

How to Clean Telescope Mirrors

how to clean telescope mirrors

How to Clean Telescope Mirrors Safely

Why worry about how to clean telescope mirrors? Keeping your astronomy equipment clean and in good working order is as important as a cloudless sky. Dirty mirrors can cause dim and blurry images, taking away from your enjoyment of the night sky, and we can’t have that, now, can we?

The Importance of Cleaning Telescope Mirrors

Telescope mirrors, especially the primary mirror in a Newtonian reflector, are prone to accumulating dust and other particles over time. While a layer of dust might not have an immediate detrimental effect on your view, it can gradually degrade image quality and clarity. Additionally, factors such as pollen, foliage, dead insects, and moisture from dew or rain droplets can further compromise the mirror’s surface. Therefore, periodic cleaning is crucial to maintain optimal performance and ensure a breathtaking stargazing experience.

This is particularly true if your equipment has been stored for a long period of time without use. It is amazing how stuff can get in there, even when the covers are on it.

Tools and Materials You’ll Need

Before diving into the cleaning process, gather the following tools and materials:

  • Clean towels: These will serve as a resting place for your mirrors while they dry.
  • Distilled water: It is best to use distilled water for the final rinse to prevent mineral deposits.
  • Cotton balls: You should get high-grade cotton balls, not cheap ones.
  • Screwdrivers, Allen keys, and pen: You’ll need these tools to disassemble and reassemble your telescope, as well as mark alignment positions. You may or may not need other tools as specified in your owner’s manual.
  • Tepid water and cleaner: Warm water and a mild detergent such as dishwashing soap will suffice for the cleaning process.
  • Instructions: If you have a manual, or can find one online, that details how to take the mirrors out of your particular telescope that will help considerably.

Be Careful!

The most important thing to remember when talking about how to clean telescope mirrors is that these mirrors are not like regular household mirrors, in that they are not meant to be robustly cleaned or even handled. In fact, if you are careful and store your telescope properly, you may never need to clean your mirror and so manufacturers do not go to extremes in protecting them from scratches and chemicals.

What this means is that you should not clean your mirror any more than necessary, never apply more force than is required, and never use harsh chemicals. One good example of a bad idea is using a glass cleaner on the mirror. Yes, the mirror is glass, but the coatings are so light and thin (so that they do not absorb too much light) that a good ammonia-based glass cleaner and a normal household rag can strip the coatings in a matter of seconds.

You should know that virtually all telescope mirrors have dust on them, and that is fine. You should only clean your mirrors when they are so dirty that they substantially affect the image you see through them. If looking through them, you can not tell that they are filthy, then they are fine!

Step 1: Remove the Primary Mirror

To begin, carefully remove the primary mirror from your telescope. This process may vary depending on the telescope model, but typically involves removing the screws around the rim of the telescope base and taking out the primary mirror cell. The mirror is held in place by mirror clips, which can be removed by unscrewing small bolts. Before removing the clips, make sure to mark the vertical edge of the mirror and the cell to ensure accurate reassembly.

Note that when you go to take the primary mirror out, it is very heavy. In most cases, it is far heavier than the rest of the telescope, so when you go to pull it out you should be prepared for that imbalance of weight. I recommend you remove the mirror assembly with the telescope on a bed or couch so that if anything comes loose rapidly and falls, it falls onto something nice and soft.

Step 2: Remove the Secondary Mirror

With the telescope set horizontally, you can now remove the secondary mirror. Hold the edge of the mirror gently and undo the center screw on the spider vane. Slowly take out the mirror and set it aside for cleaning. It is essential to handle the mirror with care to avoid any accidental damage.

Do not try this with the telescope sitting vertically, as this mirror too is fairly heavy for its size and easy to drop. If you drop it two inches to the side of the telescope, you might not hurt it. Drop that same mirror three feet out the bottom and you probably will damage it.

Step 3: Cleaning the Mirrors

Before proceeding with the cleaning process, prepare a freshly washed plastic bowl to ensure a clean and safe environment for the mirrors. Each mirror should be cleaned separately to prevent contamination.

  1. Blow off loose debris: If you have a can of compressed air, an air compressor, or a small hand blower, use that to blow away any dust and cobwebs that may be loosely attached.
  2. Soak the mirrors: Place the mirrors in their own plastic bowl filled with tepid water and a small amount of detergent. Let them soak for approximately five minutes to loosen dust and particles.
  3. Rinse the mirrors: After soaking, carefully rinse each mirror in tepid water. Place them on a soft, clean towel with the mirror surface at an angle to allow excess water to drain off. Refill the plastic bowl with fresh water after each step of the cleaning process.
  4. Cleaning the mirrors: Take a piece of well-soaked high-grade cotton wool and gently drag it across the mirror surface using the weight of the cotton wool itself. Avoid applying excessive pressure or scrubbing the surface. A stuck piece of debris is far better than a scratched mirror. Each stroke should be followed by discarding the used cotton wool and using a fresh piece for the next stroke. Repeat this process until the entire mirror surface has been treated.
  5. Rinse with distilled water: After completing the cleaning process, generously rinse the mirror surfaces with distilled water. This step ensures the removal of any residue or deposits that might have resulted from tap water. Rinse thoroughly to avoid leaving behind any traces of impurities. I like to rinse twice, just to make sure.
  6. Drying the mirrors: Place the mirrors, supported at a steep angle, on clean towels to dry. Ensure that the mirrors are in a dust-free environment during the drying process. Avoid touching the mirror surfaces or using any abrasive materials that could scratch the delicate coatings.

Pro-tip: It is crucial to maintain a dust-free environment during the cleaning process to prevent any additional particles from adhering to the mirrors. Consider performing the cleaning process in a room with minimal air circulation or use an air purifier to reduce dust particles. You can cover the mirrors while they are drying with a large bowl or plastic tub, just make sure the bowl or tub is clean and dry before using for this.

Step 4: Reassembling and Collimating Your Telescope

Once the mirrors have dried completely, it’s time to reassemble your telescope and ensure proper alignment, known as collimation. Using the previously marked positions and the appropriate tools, carefully reattach the secondary mirror and the primary mirror cell. Take your time to align the mirrors accurately to optimize the telescope’s performance and make sure to not scratch or damage anything.

If you need assistance with collimation, refer to our guide on how to collimate your telescope. Proper collimation is essential since you have removed both mirrors. Without collimation, you may not be able to see anything at all.

Additional Tips and Considerations

  • Frequency of cleaning: In general, telescope mirrors should be cleaned once every 5 to 10 years. However, the frequency may vary depending on factors such as environmental conditions and telescope usage. If you notice a significant decrease in image quality or noticeable dirt accumulation, it may be time for cleaning.
  • Preventive measures: To minimize the need for frequent cleaning, store your telescope in a clean, dust-free environment. Use dust caps on the tube and eyepiece holder when not in use. Additionally, consider investing in a telescope case or protective covers to shield your instrument from dust and debris.
  • Avoid scratching the mirrors: Scratches on the mirror surface can have a more detrimental impact than dust. Exercise caution during the cleaning process, ensuring no abrasive materials or excessive force are applied.
  • Professional cleaning: If you are uncertain about cleaning your telescope mirrors or encounter significant issues, it is advisable to seek professional assistance. Telescope manufacturers or specialized telescope shops can provide expert cleaning services when needed, or you may be able to get assistance from your local astronomy club.

Remember, a clean telescope mirror is just one aspect of maintaining your telescope. Regularly check and clean other components, such as eyepieces, lenses, and the telescope’s overall structure, to keep it in optimal condition for your astronomical adventures.

I hope you learned how to clean telescope mirrors!

Understanding the Different Types of Telescopes

Different types of telescopes

There are several different types of telescopes. Which is right for you? Let’s take a look.

Telescopes have long been the gateway to exploring the wonders of the night sky. Whether you’re a seasoned astronomer or a beginner with a passion for stargazing, understanding the different types of telescopes available is crucial in finding the perfect instrument that suits your needs. In this comprehensive guide, we will delve into the world of telescopes, exploring the primary types and their unique features. From refractors and reflectors to catadioptric telescopes, we’ll uncover the strengths and limitations of each design, helping you make an informed decision.

1. Refractor Telescopes: The Best and Worst for Beginners

One of the oldest and most recognizable types of telescopes is the refractor telescope. Utilizing specially designed lenses to focus incoming light, refractors offer crisp and clear images of celestial objects. These telescopes have a long and illustrious history being designed in Middelburg Netherlands in 1608 by an ingenious eyeglass maker named Hans Lipperhey, who put two glass lenses together in a tube, effectively creating the first ‘refracting’ telescope.

An excellent beginner refractor telescope
Celestron AstroMaster 90EQ Refractor Telescope

1.1 The Inner Workings of Refractor Telescopes

The optical system of a refractor telescope consists of a front lens or lenses, known as the objective, and an eyepiece at the rear. The objective lens is responsible for gathering and angling incoming light, bringing it to a focal point at the eyepiece where it can be magnified for observation.

1.2 Advantages and Limitations of Refractor Telescopes

Refractor telescopes offer several advantages that make them popular among astronomers. Their sealed tube design makes them virtually maintenance-free, with no need for periodic collimation like reflector telescopes. Additionally, refractors are well-suited for observing celestial objects during both daytime and nighttime, making them versatile instruments.

However, refractor telescopes also have some limitations. One common issue is chromatic aberration, which occurs when different colors of light are refracted at slightly different angles, resulting in color fringing around objects. This phenomenon is more pronounced in lower-cost refractors with doublet lenses. Higher-end doublets and triplets, on the other hand, are designed to minimize chromatic aberration, offering superior image quality.

Since there is less scattering of light, refractors tend to have higher contrast than reflectors providing excellent views for their size.

The last and one of their biggest advantages is they are faster and easier to set up, requiring less cool-down time before they can be used, which makes them excellent choices for a “grab-and-go” telescope.

1.3 Disadvantages and Cautions

Since the construction of refractors is so simple, there is a huge number of cheap refractors flooding the market. Some are pretty much a semi-clear piece of plastic glued inside a hollow plastic tube with another semi-clear piece of plastic acting as an eyepiece.

There is a massive difference between an inexpensive but good refractor telescope like Celestron AstroMaster 70AZ Refractor Telescope and a Gskyer 70mm AZ Mount Astronomical Refracting Telescope even though there is little difference in price. The former would make a nice beginner telescope for your children, the latter will do little more than make everyone upset (your kids because they can’t see diddly, you for being the chump who bought them useless junk).

It is so bad that people have had to make entire websites dedicated to helping people who bought the cheaper scopes figure out how to use them and show them what can and can not be done with them like gskyertelescopes.net. The manufacturers are simply giving them a single sheet of paper with very rough assembly instructions and telling them “good luck!”

An excellent beginner Newtonian telescope
Celestron AstroMaster 114EQ Newtonian Telescope

2. Reflectors: Harnessing the Power of Mirrors

Reflecting telescopes, also known as reflectors, utilize mirrors to gather and focus light. This design offers several advantages over refractors, making them a popular choice among astronomers of all levels. These require more setup, longer cooling times, and constant maintenance but provide brighter views allowing you to see fainter objects.

2.1 The Magic of Reflecting Telescopes

At the heart of every reflecting telescope is a primary mirror that captures and reflects incoming light. This mirror is typically concave in shape, directing the light towards a secondary mirror positioned near the front of the telescope tube. The secondary mirror then reflects the light out of the side of the telescope, allowing for easy observation through an eyepiece.

These are typically Newtonian telescopes and can be either mounted on a tripod or for larger models, set inside a Dobsonian base. Interestingly enough, the design of the telescope is identical even though one is called a Newtonian after the designer of the telescope, and the other a Dobsonian after the designer of the base.

2.2 The Benefits and Considerations of Reflectors

Reflecting telescopes have numerous advantages, including cost-effectiveness and a wide range of available apertures. Due to the simpler design and the use of mirrors instead of lenses, reflectors tend to be more affordable than refractors of the same size. This makes them an attractive choice for beginners or those on a limited budget.

Another advantage of reflectors is their ability to produce bright and detailed images. Since you are likely to have a larger aperture on your reflector, the primary mirror gathers a significant amount of light, allowing for better visibility of faint objects in the night sky. Additionally, reflectors are not susceptible to chromatic aberration, which can be a limiting factor in refractor telescopes.

However, reflector telescopes also have their issues. One drawback is their open-tube design, which makes them more prone to dust and debris accumulation. Regular cleaning and maintenance are necessary to ensure optimal performance. Additionally, reflectors often produce an inverted or flipped image, which can be disorienting for beginners. However, this can be easily remedied by using additional accessories like finderscopes or red dot finders.

Reflectors require more cool-down time, particularly with larger models. They often have fans at the bottom of larger models to help cool the primary mirror faster. Viewing before the mirrors have acclimated to the surrounding air temperature can present the viewer with poor views.

Lastly, reflectors need to be collimated frequently to provide good images. While this is a fairly fast and painless operation once you learn how and get some practice, particularly if you purchase a laser collimator, it is still an extra layer of work necessary to make use of this type of telescope.

3. Catadioptric Telescopes: The Best of Both Worlds

Catadioptric telescopes, also known as compound telescopes, combine the benefits of lenses and mirrors into a compact and versatile design. These telescopes offer a unique optical system that provides excellent image quality and portability. This comes at the expense of extended cool-down times, increased costs, and a heavy telescope.

A higher-end telescope but still excellent for beginners
A Celestron 8″ SCT on a GOTO mount

There are two popular types of catadioptric telescopes, Schmidt-Cassegrain (SCT) and Maksutov-Cassegrain (MCT). While there are other types, these are the ones you will most likely run into, with the Schmidt-Cassegrain being the most popular of the two.

3.1 Understanding the Inner Workings of Catadioptric Telescopes

The optical system of a catadioptric telescope consists of both lenses and mirrors. The light enters the telescope through a corrector plate, which acts as the front lens. The light then passes through the corrector plate and is reflected by a primary mirror at the back of the telescope. Finally, a secondary mirror reflects the light back through a central hole in the primary mirror, allowing for observation through an eyepiece.

3.2 The Advantages and Considerations of Catadioptric Telescopes

Catadioptric telescopes offer a range of advantages that make them an appealing choice for both beginners and experienced astronomers. Their compact and portable design makes them easy to transport and set up, allowing for stargazing adventures on the go. Additionally, catadioptric telescopes are known for their versatility, offering various focal lengths and apertures to suit different observing needs.

One consideration when using catadioptric telescopes is the need for occasional collimation. While not as frequent as pure reflectors, periodic adjustments may be necessary to ensure optimal performance. However, modern catadioptric telescopes often come with built-in collimation mechanisms, simplifying the process for users.

3.3 Schmidt-Cassegrain or Maksutov-Cassegrain?

SCTs and MCTs are very similar, both using lenses and mirrors to provide the best of both worlds. There is a lot of technical information as to which is better at what and why, but that is beyond the scope of this article (pun intended!) so I will just give you the basics.

MCTs usually have better image quality and higher magnification than a comparable SCT, they are also slightly more expensive, weigh more, and provide a dimmer image (this is normal since it provides more magnification). If I was looking to view nebulae, open clusters, and constellations I would take an SCT. For globular clusters, splitting stars, planetary, and high-magnification views of the moon, an MCT would be my choice.

4. Choosing the Right Telescope for Your Needs

Now that we’ve explored the primary types of telescopes, it’s time to consider which one is the best fit for your needs. When choosing a telescope, several factors should be taken into account, including your observing goals, budget, and level of experience.

4.1 Factors to Consider When Choosing a Telescope

4.1.1 What will you actually use?

This may sound silly, but I have seen it more times than I can count. People buy a telescope that is too cheap to actually see anything any better than they could with their unaided eyes, or they buy one that is so huge and/or complex that they just don’t want to go through the hassle of dragging it out and setting it up.

Therefore the primary consideration, above and beyond anything else, is to think about if you honestly will use this telescope when the opportunity arises. A $130 little refractor is better than an $11,000 20″ Obsession Dobsonian if you will use the refractor and the Dobsonian never gets wheeled out of the garage.

Don’t be tricked into the “better views” argument often made for bigger and/or more expensive telescopes. The best views are had by the person out using their telescope.

4.1.2 Observing Goals and Realistic Expectations

When looking at the differnt types of telescopes, before you purchase, it’s essential to determine your observing goals. Are you primarily interested in visual observation or do you plan to delve into astrophotography? Are you more into widefield (large expanses of the sky), viewing the moon, or are you looking for something to get serious detail out of Saturn? Different types of telescopes excel in different areas, so it’s crucial to align your goals with the telescope’s capabilities.

You should also look into what telescopes in your price range can actually deliver. You can see the rings of Saturn and some of Jupiter’s moons with virtually any reasonable beginner telescope, but no telescope for any amount of money is going to show you Neptune as anything more than a dot in the sky. And I mean any amount of money, even if your last name is Bezos.

There is little as frustrating as spending your hard-earned money on something only to find out later that it could not do what you wanted.

This works the other way too, spending too little because you “only” want to do something simple, you don’t need a powerful telescope, you aren’t trying to be a professional astronomer. That super-cheap department store telescope is not worth the little you paid for it, heck, it wasn’t worth the gas you burned driving to pick it up. Got it delivered for free? It wasn’t worth the calories you burned clicking the Buy Now button either.

4.1.3 Budget

Budget plays a significant role when looking at the different types of telescopes. Refractor telescopes tend to be more expensive per inch of aperture, especially as you move into larger apertures. Reflecting telescopes offer a cost-effective option, particularly for those looking to maximize aperture size but require more maintenance and longer cool-downs. Catadioptric telescopes require even more time to cool down, are somewhat more complex to set up and use, but are smaller than many reflectors and cheaper per inch than refractors.

Used is a good option, but only when purchased from somewhere or someone that can give you assistance and/or a refund if the item does not work. I highly recommend staying away from pawn shops, yard sales, and online resellers (eBay, Facebook marketplace, etc) for your first telescope as you do not have enough knowledge and experience to know how to keep from getting taken by a defective item.

If you are intent on buying used, find your local astronomy club and show up to a meeting. Ask around and you are sure to find people who are upgrading their scopes, or know of someone who is. These are people who know what to look for and can help you get an excellent telescope that fits your needs at a reasonable price. If you are in the United States, you can check out go-astronomy.com to find the club closest to you.

No idea where to start or what a reasonable telescope should cost? No problem! Check out this article on the best beginner telescopes.

4.1.4 Level of Experience

Consider your level of experience when looking at the different types of telescopes. If you’re a beginner, user-friendly options like Dobsonian telescopes or refractors may be a good starting point. For more experienced astronomers, advanced designs like Schmidt-Cassegrains or apochromatic refractors offer greater versatility and performance.

Also, consider the mount when thinking of a purchase as an equatorial mount will be more complex to set up and use than an altitude azimuth model. The flip side of that is that an EQ mount is far superior for advanced users and required for long-exposure astrophotography.

4.2 Making an Informed Decision

By evaluating your observing goals, budget, and level of experience, you can make an informed decision when selecting a telescope. Remember that the best telescope is the one that you are comfortable using, that you actually will drag out and use, and one that suits your specific needs. Don’t forget to pay attention to the mount, as it can significantly enhance your stargazing experience.

5. Conclusion on the Different Types of Telescopes

The world of telescopes is vast and fascinating, with each different types of telescopes offering its own unique advantages and considerations. Whether you choose a refractor, reflector, or catadioptric telescope, each instrument has the power to unveil the mysteries of the night sky. By understanding the inner workings and strengths of each design, you can be sure to get the tool that best suits your interests and budget. So, take the time to explore the different types of telescopes, weigh the options, and prepare for unforgettable celestial adventures. Clear skies await!

How to collimate a telescope

What is telescope collimation?

Telescope collimation refers to the process of aligning the optical components of a telescope to ensure precise focus and accurate viewing. It involves adjusting the alignment of the mirrors or lenses within the telescope to eliminate any misalignments or aberrations that may affect the clarity of the images produced. Collimating a telescope is an essential skill for any amateur astronomer as it directly impacts the quality of observations.

Why is telescope collimation important?

Proper telescope collimation is crucial for achieving optimal performance and maximizing the potential of your telescope. When the optical components are correctly aligned, the telescope can focus light effectively, resulting in brighter, sharper, and clearer images. Without collimation, the images may appear dim, blurred, out of focus, or distorted, making it challenging to observe celestial objects accurately.

Additionally, collimation plays a significant role in the overall accuracy of a telescope. Misalignment of the mirrors or lenses can introduce optical errors such as astigmatism or coma, which can significantly impact the quality of the images. By regularly collimating your telescope, you can ensure that it is always performing at its best and provide yourself with the opportunity to truly appreciate the wonders of the night sky.

Signs that your telescope needs collimation

It is essential to recognize the signs that indicate your telescope requires collimation. Here are a few common indicators:

  1. Blurred or fuzzy images: If the images produced by your telescope appear out of focus, even after adjusting the focus knob, it may be a sign of misaligned optics that require collimation.
  2. Astigmatism or coma: If you notice that stars appear distorted, elongated, or shaped like comets rather than crisp points of light, it may be an indication that your telescope’s optics need to be collimated.
  3. Uneven or dim images: When observing celestial objects, if you notice that the brightness or sharpness of the image varies across the field of view, it could be a result of misaligned optics that need collimation.
  4. Difficulty in achieving high magnification: If you find it challenging to achieve high magnification without the image becoming blurry or distorted, collimation may be necessary to correct the alignment of the optical components.

Why do I have to collimate my telescope?

You may be asking why you have to collimate the telescope, why do they not just adjust it at the factory? In most cases, they do. Unfortunately, a lot of things can change the collimation. Since the mirrors need to be exactly aligned and they are very heavy compared to the rest of the telescope, it doesn’t take much for them to become misaligned.

  1. Movement: Even if you are very careful moving your telescope around, the shift in weight (particularly with the primary mirror) can stress items and cause the alignment to shift slightly. This effect is worse on less expensive telescopes and on larger telescopes.
  2. Temperature: Large temperature changes can cause components of the telescope to expand and contract, which changes the alignment of the mirrors. This is why experienced telescope users will often collimate their telescopes several times during an all-night viewing or imaging session.
  3. Use: Just using the telescope can cause things to move around, and given the accuracy needed to keep the best quality image, over time this can cause things to become misaligned.

Do I need to collimate my refractor telescope?

If you own a refractor, you are very likely to never have to collimate it. In fact, it is unlikely that you could collimate it even if you wanted to as they are rarely adjustable. Most of the time the telescope is collimated at the factory and the lenses are glued or otherwise permanently affixed to the tube so they can not be adjusted.

Refractors have a straight light path through a single tube so it is much easier to just line them up and permanently mount everything. Since everything is affixed in a single straight tube, everything expands and contracts at the same rate keeping the collimation the same.

Higher-end refractors may have lens ‘cells’ (all the lenses are fused together in a module and that module can be moved around in the telescope tube) and these cells may be adjustable but they are very rarely collimated by the end-user.

Different methods of telescope collimation

There are several methods available for collimating a telescope, and the choice of method depends on the type of telescope you own and your personal preference. Here are some common methods:

A collimating Cheshire eyepiece
A Cheshire eyepiece
  1. Collimation using a Cheshire eyepiece: A Cheshire eyepiece is a specialized tool designed for telescope collimation. It consists of a tube with a peephole and a reflective surface. By inserting the Cheshire eyepiece into the focuser and adjusting the telescope’s primary and secondary mirrors, you can achieve proper collimation. This is the “old-school” approach and has been replaced almost completely with the laser collimator.
  2. Laser collimation: Laser collimators are popular tools for collimating telescopes. They emit a laser beam that helps align the optical components. By following the laser beam’s reflection and making necessary adjustments, you can achieve precise collimation. This is the most popular method as it is fast, cheap, and easy. It also can be done in the garage while it is pouring down rain.
  3. Autocollimation: Autocollimation involves using an autocollimator, which is a device that combines a light source and a collimating lens. The autocollimator allows you to observe the image of the primary mirror and make adjustments accordingly.
  4. Star collimation: Star collimation involves observing a bright star through the telescope and adjusting the mirrors or lenses until the star appears as a perfect point of light. This method requires patience and clear skies, making it more suitable for experienced observers. We will talk about this later as a “star test”.

Step-by-step guide on how to collimate a telescope

Collimating a telescope may seem daunting at first, but with practice and patience, it becomes a straightforward process. Here is a step-by-step guide to help you collimate your telescope:

A typical laser collimator
  1. Understand your telescope: Familiarize yourself with the specific collimation adjustments your telescope requires. Refer to the telescope’s user manual or online resources for detailed instructions. Most of the time you will be collimating a Newtonian which will have adjustment screws/knobs on the spider vane mount, and on the very rear of the telescope. Many rear adjustments have two sets of screws/knobs, one for locking and another for the actual adjustments.
  2. Prepare your tools: Gather the necessary tools for collimation, which may include a Cheshire eyepiece, laser collimator, autocollimator, or any other method-specific tools. Ensure they are working correctly, including checking the batteries. Check to see what specific tools you may need to adjust the screws/knobs.
  3. Choose a suitable location: Find a solid place to place your telescope so that you can access both sets of adjustment screws/knobs. If using a Cheshire eyepiece or laser collimator, you can do this inside. For collimating using the stars, of course, you will need clear dark skies.
  4. Align the primary mirror: If your telescope has a primary mirror (the biggest, near the rear of the telescope), start by adjusting its position. Follow the specific instructions for your telescope model, making small adjustments until the mirror is properly aligned. This one adjustment tends to handle 90% of the adjustments I need on a regular basis.
  5. Check the centering of the secondary mirror: Most Newtonian telescopes have spider vanes that hold the secondary mirror in the center of the tube (check your manual or with the manufacturer, if it seems the secondary is offset intentionally). Many of these you can adjust with screws/knobs on the side of the telescope tube. Use a ruler to measure the distance between the secondary mirror and the side of the telescope tube and make adjustments as necessary to ensure the secondary mirror is centered in the tube.
  6. Collimate the secondary mirror: Next, focus on collimating the secondary mirror, again referring to the instructions for your telescope. Use the chosen collimation method to align the secondary mirror accurately.
  7. Fine-tune the collimation: Once the primary and secondary mirrors are aligned, fine-tune the collimation by making small adjustments until the laser is dead center, or until images appear sharp and well-focused.
  8. Verify collimation: To confirm that your telescope is properly collimated, observe a distant object or a bright star. If the images appear clear and well-defined, you have successfully collimated your telescope.

Common mistakes to avoid when collimating a telescope

While collimating a telescope may seem straightforward, there are some common mistakes that beginners often make. Here are a few to avoid:

  1. Making large adjustments: When collimating, it is essential to make small, incremental adjustments to the primary and secondary mirrors. Making large adjustments can lead to overcorrection and result in misalignment.
  2. Neglecting environmental factors: Collimation can be affected by environmental factors such as temperature changes, wind, or vibrations. Ensure that you collimate your telescope in a stable environment to minimize these factors’ impact.
  3. Not checking collimation regularly: It is crucial to regularly check and maintain your telescope’s collimation. Over time, vibrations, transportation, or other factors can cause misalignments. Regularly verifying collimation ensures that your telescope is always performing optimally.
  4. Ignoring proper tool usage: Each collimation tool has specific instructions for use. Failing to follow the instructions or misusing the tools can result in inaccurate collimation. Take the time to understand how each tool should be used correctly.

By being aware of these common mistakes and avoiding them, you can ensure that your collimation efforts yield accurate and satisfying results.

Using a Star Test to verify collimation

Once you think your collimation is correct there is an excellent way to test and see if that is the case, a star test. This is the same procedure that advanced users can use to collimate their telescope without a collimator but here we are using it just to verify our work.

  1. Find a clear, still night and let the telescope cool down to the ambient temperature outside, this can take several hours for a Dobsonian or large Newtonian.
  2. Find a bright star in the sky such as Polaris and using a low-power eyepiece center it in your field of view.
  3. Switch to a very high-power eyepiece (preferably at least 25x per inch of aperture) and defocus just a tiny little bit.
  4. Ideally, you should see several concentric rings appear around the central point of your star, these rings should be perfectly round and centered. If the center is not perfectly in the center then your collimation is out of adjustment.
Star test examples for collimation on a telescope
Excellent collimation on the left getting progressively worse to the right

One note here is that different telescopes, different magnifications, and different amounts of defocusing will produce slightly different-looking images so do not panic if your results do not exactly match these.

An example of checking collimation by defocusing an SCT telescope
An example SCT with bad collimation on the left and getting progressively better toward the right

You can adjust your collimation using this method but you must make sure to make extremely small adjustments or the star will jump out of your field of view. You must also make these adjustments quickly if your mount is not tracking. While this works and can achieve very accurate results, I do not recommend it for normal collimation because it takes a lot of practice to use this method without becoming frustrated.

If your defocused pattern looks more like a supernova explosion than concentric rings, then you have too much atmospheric turbulence to perform the star test.

Lastly, if your pattern looks overall like a triangle or heart shape, then your mirror is stressed which can be caused by something being too tight such as the collimation adjustment screws/knobs (or the locking screws/knobs), or your tube rings could be too tight.

Tips for maintaining a collimated telescope

Once you have successfully collimated your telescope, it is important to maintain its collimation for optimal performance. Here are some tips to help you maintain a collimated telescope:

  1. Handle with care: Treat your telescope with care to avoid any accidental misalignments. Avoid rough handling or sudden movements that may disturb the collimation.
  2. Transportation precautions: When transporting your telescope, secure it properly and take precautions to minimize vibrations. Use padded cases or protective covers to safeguard the optical components. Be sure telescopes are on something soft and forgiving like your car seats instead of in the trunk.
  3. Regular checks: Periodically check your telescope’s collimation, especially after transportation or prolonged storage. A quick verification ensures that your telescope is ready for observing sessions and if necessary, small adjustments are much faster and easier than larger ones.
  4. Calibrate your tools: If you are using collimation tools, such as a laser collimator or Cheshire eyepiece, regularly calibrate them to maintain their accuracy. Follow the manufacturer’s instructions for calibration procedures. Do not store batteries in laser collimators and be sure to check them before heading out to use your telescope.
  5. Keep your telescope clean: Dust or debris on the mirrors or lenses can affect collimation. Clean them carefully using appropriate cleaning methods and tools to ensure optimal performance. Above all, keep everything covered.

By incorporating these maintenance tips into your routine, you can enjoy consistently clear and sharp views through your telescope.

Conclusion

Collimating a telescope is an essential skill for any amateur astronomer. By mastering the art of telescope collimation, you can ensure that your telescope performs optimally, providing bright, clear, and detailed views of the night sky. Understanding the importance of collimation, recognizing the signs that your telescope needs collimation, and following the step-by-step guide can help you achieve accurate alignment of your telescope’s optical components.

Remember to choose the right collimation method for your telescope, gather the necessary tools, and avoid common mistakes. I highly recommend a laser collimator as it is inexpensive, fast, easy, and accurate.

Regularly maintain the collimation of your telescope, handle it with care, and calibrate your tools for accurate results.

Mastering the art of telescope collimation is a journey that requires practice and patience. By dedicating time to collimating your telescope, you can unlock its full potential and embark on an incredible journey of observing the wonders of the universe. So grab your telescope, follow the steps, and enjoy the breathtaking views that await you. Happy collimating!

Master telescope collimation today and experience the wonders of the night sky with the brightest crystal-clear images your telescope is capable of! 

Explore the Cosmos without Breaking the Bank: Your Guide to Astronomy on a Budget

As an avid stargazer and someone born in the 1960s during the great space race, I have always been fascinated by the mysteries of the cosmos. However, like many others, I was hesitant to dive into astronomy due to the perceived high costs associated with telescopes and other equipment. But let me assure you, pursuing astronomy as a hobby doesn’t have to burn a hole in your pocket. In this guide, I will share with you my tips and tricks on how to explore the wonders of the cosmos without breaking the bank.

Benefits of pursuing astronomy as a hobby

Before we delve into the practical aspects, let’s first discuss the benefits of pursuing astronomy as a hobby. Apart from the sheer joy of observing celestial objects, astronomy offers numerous advantages. It allows you to develop patience, as certain celestial events can require long periods of observation. Additionally, stargazing provides a sense of awe and wonder, fostering a deeper appreciation for the vastness of the universe and our place within it. Furthermore, astronomy can be a great stress reliever, as it encourages you to step outside, breathe in the fresh air, and marvel at the beauty of the night sky.

Probably the greatest part is that you get to choose the benefits you want. Astronomy can be fun for just a few minutes every now and then to get a close look at the moon or observe the rings of Saturn. It can be strictly for special events such as eclipses. You could even use it as an excellent way to get yourself, or your child started down the road to serious scientific study.

The different ways you can use and enjoy astronomy are almost limitless.

Exploring the night sky without a telescope

Contrary to popular belief, you don’t always need a telescope to enjoy astronomy. There are numerous celestial objects and events visible to the naked eye or with the help of binoculars. The moon, for instance, offers a wealth of detail that can be observed with binoculars or even the naked eye. Additionally, meteor showers, such as the famous Perseids, provide breathtaking displays that can be enjoyed without any equipment. By familiarizing yourself with the night sky and learning to identify constellations and stars, you can have a rewarding stargazing experience without a telescope.

There are programs you can participate in to see how many objects you can view with just your eyes! A great place to start is this fantastic article The Eyes Have It — Deep-Sky Observing Without Equipment from Sky & Telescope magazine. This can be one of the most relaxing ways to experience astronomy and is a fantastic experience to share with someone.

From there you can graduate to a pair of binoculars or a telescope if you want to.

Selecting binoculars for astronomy

Astronomy binoculars for the beginner

When selecting a pair of binoculars for astronomy the best pair to start with is a pair you already own. There is absolutely nothing wrong with using a pair that are completely unsuited to astronomy as they will at least give you an idea of what you can expect and how you want to improve with your next pair.

If you do not have a pair and are looking for something to start with on a budget, the Celestron 71198 Cometron 7×50 Binoculars. These will absolutely get you started in the right direction and even if you decide you want to stick with viewing the heavens with just your eyes or want to step up to a telescope, you spent too much.

Choosing the right budget telescope

A telescope is the primary tool for any aspiring astronomer. However, with the vast array of options available, selecting the right telescope within your budget can be overwhelming. The key is to prioritize your needs and understand the different types of telescopes available. Refractor telescopes, for example, provide crisp and clear images but can be more expensive per inch of aperture. On the other hand, reflector telescopes are generally more affordable but require occasional maintenance and adjustments. Do thorough research and read reviews to find a telescope that strikes the right balance between affordability and quality.

The absolute most important thing to consider when purchasing a telescope is how often you think you will use it. I don’t mean how often you will want to use it, but how often you will drag it out, set it up, adjust it, and actually use it.

You might think all telescopes are the same here, but they are not. The larger the telescope, the more you can see. Many people get suggestions of starting out with an 8″ Dobsonian telescope which is an excellent starter telescope. It is also over four feet long, almost fifty pounds, requires assembly every time, requires collimation frequently, and requires extensive cool-down times before use.

Cheap little refractors you often find in department stores for around $100 or less have the opposite problem of not being able to actually show you anything and they are extremely easy to break. Indeed an inexpensive pair of binoculars are far superior to these toys. All these telescopes will do is ruin the hobby for anyone who tries to use them.

Celestron - AstroMaster 90EQ beginner telescope

One of the best beginner telescopes out there is the Celestron AstroMaster 90EQ Refractor Telescope. It is fast and easy to set up, has good quality optics, requires no collimation or maintenance, is large enough to view a lot of objects, comes with some nice software to help you find objects, and should last many years.

Tips for finding inexpensive astronomy equipment

Apart from telescopes, there are several other tools and accessories that can enhance your astronomy experience. Fortunately, there are ways to find these items without breaking the bank. One option is to borrow equipment from local astronomy clubs or organizations. Many enthusiasts are happy to lend their equipment to fellow stargazers, especially beginners. Another option is to look for second-hand equipment at flea markets, garage sales, or online classifieds. While these items may not be the latest models, they can still provide a fulfilling stargazing experience at a fraction of the cost.

If you have a knack for DIY projects, consider building your own astronomy equipment. For example, you can construct a simple star tracker to capture stunning night sky photographs with your smartphone. There are plenty of online resources and tutorials available to guide you through the process. By building your own equipment, you not only save money but also gain a deeper understanding of the mechanics behind stargazing. There are even books like Getting Started: Budget Astrophotography by Allan Hall that have huge sections of DIY projects in them that work with astronomy as well as astrophotography.

Buying used equipment

There is nothing wrong with used equipment, but there are some things you should think of before spending any money on garage sale finds or eBay auctions.

finding astronomy gear as a yard sale

Of course, the biggest issue for beginners is, other than the seller’s word, how do you know something works as it should? There is very little more frustrating than buying something and having it not do what you expect it to do. When you are buying used, is it not meeting your expectations because you don’t know how to use it? Because it is not the right item and therefore can not meet your expectations? Or because it is defective?

If you buy new, you at least have the hope of some kind of support (which is why I recommend you purchase from larger manufacturers like Celestron, Meade, Orion, etc for your first telescope), and should there be a defect, some kind of return or refund policy.

Once you have been doing this a while, and you know enough to check them out fairly thoroughly, then flea markets, online auctions, and yard sales can be good sources. I would recommend you stay away from antique stores though, they are, in my experience, a little too proud of astronomy gear, and rarely know anything about the items.

Free or low-cost resources for astronomy enthusiasts

In the age of technology, there are plenty of free or low-cost resources available for astronomy enthusiasts. Smartphone apps like “SkyView” and “Star Walk” allow you to identify stars, planets, and constellations simply by pointing your phone towards the sky. These apps also provide valuable information about upcoming celestial events and stargazing tips. Additionally, websites like NASA’s “Astronomy Picture of the Day” feature stunning images and educational content that can deepen your knowledge of the cosmos. Public libraries often have a plethora of astronomy books and magazines that you can borrow for free, allowing you to expand your understanding of the universe without spending a dime.

One of the favorites among amateur astronomers is Stellarium, a planetarium program for Linux, MacOS, and Windows and they even have a version you can use right in your web browser! It is completely free and a fantastic program.

Joining astronomy clubs and communities

One of the best ways to immerse yourself in the world of astronomy is by joining local astronomy clubs and communities. These groups often organize stargazing events, workshops, and lectures that are open to members. By connecting with fellow enthusiasts, you can learn from experienced astronomers, share your observations, and discuss the latest discoveries. Furthermore, many astronomy clubs have access to observatories and telescopes, which can be utilized by members at little or no cost. The sense of camaraderie and shared passion within these communities is invaluable, making your astronomy journey even more enjoyable.

If you are in the United States, you can find a club close to you by visiting the interactive map at go-astronomy.com.

Budget-friendly astrophotography techniques

Astrophotography is a popular aspect of astronomy that allows you to capture stunning images of celestial objects. While it may seem like an expensive endeavor, there are budget-friendly techniques that can yield impressive results. One approach is to use a DSLR camera with a tripod and a telephoto lens. By taking long-exposure shots of the night sky, you can capture the beauty of stars, constellations, and even distant galaxies. Additionally, smartphone astrophotography has come a long way in recent years. With the help of apps and accessories like smartphone adapters, you can capture impressive images of the night sky using just your phone.

When you couple this with some DIY projects, you would be amazed at what you can create! Again, I would recommend Getting Started: Budget Astrophotography by Allan Hall if you want to get into astrophotography on a budget.

Scientific astronomy projects and experiments

For those who enjoy hands-on projects, there are countless astronomy projects and experiments that you can undertake. From simple observations like counting meteors during a shower, to spectroscopy, and even searching for never before seen asteroids, there is a huge array of activities that can allow you to contribute to science in a real way.

budget astrophotography spectroscopy

One of my favorite books here is Scientific Astrophotography: How Amateurs Can Generate and Use Professional Imaging Data by Gerald R. Hubbell. While this is far above beginner level, it is a great reference to give you an idea of where you might want to go.

Conclusion: Embrace the wonders of the cosmos without breaking the bank

Pursuing astronomy as a hobby doesn’t have to be an expensive endeavor. With the right approach and a little creativity, you can explore the wonders of the cosmos on a budget. Whether it’s finding a budget telescope, utilizing free resources, or engaging in DIY projects, there are numerous ways to immerse yourself in the beauty of the night sky without emptying your wallet. So go ahead, embrace the wonders of the cosmos, and let your passion for astronomy take flight. Happy stargazing!

How to Focus in Astrophotography

Astrophotography is a fascinating hobby that allows us to capture the beauty and vastness of the cosmos. One of the most crucial aspects of this art form is achieving proper focus on celestial objects. In this comprehensive guide, we will discuss various methods, tools, and techniques for focusing in astrophotography, including the use of a Bahtinov Mask, manual focus, and software-assisted focusing.

Introduction to Focusing in Astrophotography

Focusing is a critical step in astrophotography, as it determines the clarity and sharpness of the final image. Achieving perfect focus can be a challenging task, particularly when dealing with faint and distant objects in the night sky. There are several methods and tools available to help astrophotographers achieve optimal focus, and we will delve into the most commonly used techniques in this guide.

Factors Affecting Focus

Several factors can affect the focus in astrophotography, including:

  1. Ambient temperature: Temperature changes can cause the focus to shift, as the optics and mechanical components of the camera and telescope expand or contract. You should never try and focus a telescope or camera lens when its temperature is substantially different than the air around it. They should be allowed to ‘equalize’ first, which depending on the lens or telescope and temperature differential, can take as little as 15 minutes, or many hours. This is why astrophotographers typically set up during the day and allow their equipment to equalize until it is time to start shooting that night.
  2. Optical quality: The quality of the optics in your camera lens or telescope plays a significant role in achieving sharp focus. Also, as a general rule, the fewer optical objects in the path of the light, the sharper your image will be.
  3. Focal length and aperture: The focal length and aperture of your camera lens or telescope will determine the depth of field and the amount of light reaching the sensor, which in turn affects the ease and accuracy of focusing. On camera lenses, the aperture usually provides sharper images close to the center of the aperture range. For example, a lens that ranges from f2.8-f32 is usually sharpest around f8 or f11. The most significant improvement usually occurs at the ends so moving from f2.8 to f4 is usually a bigger improvement than moving from f4 to f5.6. Also, as a general rule, an f4 lens at f4 is usually sharper than an f2.8 lens at f2.8, but not quite as sharp as an f2.8 lens at f4.
  4. Atmospheric conditions: Turbulence in the Earth’s atmosphere can cause stars to appear blurry or distorted, making it difficult to achieve precise focus. Particles in the atmosphere can also cause serious issues whether those particles are dust, smoke, or even water vapor.

Focusing Methods

There are various methods available for focusing in astrophotography, each with its advantages and drawbacks. We will discuss some of the most popular methods in the following sections.

1. Manual focus using your camera lens’ scale

This is only when using your camera with a camera lens attached, specifically one that can be focused manually.

These lenses often have a scale on the lens barrel that shows the distance to the object you want to be in focus, and there is typically an infinity symbol ∞. Lenses often will allow you to move the focusing ring slightly past the infinity symbol, my guess is that Buzz Lightyear was on their design team.

Different lenses will focus at infinity at different points. Just because the pointer on your lens shows it is set to infinity, does not mean it is really focusing there. guessing again here I imagine that people taking pictures and needing to manually focus at an object that is millions of light years away is probably not really on the mind of the lens designers so accuracy here is not on the top of the list of things they worry about. The cheaper the lens, the more this is probably true.

My higher-end Nikon lenses tend to be fairly accurate here, Sigmas and Tamrons, not so much. Any way it works you will need to adjust a little to get it right using one of the other methods listed here. Do not just set the lens at infinity and think you are done.

2. Focusing by Eye

Focusing by eye involves looking through the viewfinder of your camera or telescope and adjusting the focus manually. While this method may seem straightforward, it is often inaccurate and relies heavily on the user’s eyesight and judgment. Focusing by eye is not recommended for astrophotography, as it is difficult to achieve consistent and repeatable results.

3. Magnifier / Right Angle Finder

Using a magnifier or right-angle finder can improve the accuracy of focusing by eye. These devices attach to the eyepiece of your camera or telescope, providing additional magnification for more precise focusing. However, they can also make the view dimmer and are sensitive to the position of the observer’s eye. Also, every extra attachment or lens you add into the path of the light inherently makes the image less sharp and so makes achieving a final sharp image more difficult.

4. Digital Zoom Trial and Error

This method involves taking short test exposures and examining the images on your camera’s LCD display. By adjusting the focus and comparing the results, you can gradually refine the focus until the stars in the image are as sharp and small as possible. This approach can be time-consuming but offers the advantage of using actual images from the camera sensor to determine focus.

This is one of the most common methods for newcomers to the hobby and while it may seem like it should achieve sharp focus, in reality, it does not.

5. Live View Focusing

Live View focusing is a popular method that involves using the camera’s Live View mode to display a real-time image on the LCD screen. By zooming in on a bright star and adjusting the focus, you can achieve a precise focus more quickly and easily than with other methods. This technique is particularly useful for DSLR cameras.

For what most people think of as astrophotography, this is another one of those that seems like it should work really well, but in the end, does not. When compared to using a focusing mask, this method falls far short. I too was one who swore by this method, until I started using a mask.

Where this is very useful, is finding where the infinity focus on your lens is when using a standard camera lens shooting widefield (large areas of the sky which may or may not include foreground objects/landscapes). I will often use this method to set the focus on widefield shots and then use masking tape to hold the ring in place so it does not move throughout the night.

6. Bahtinov Mask

A Bahtinov Mask used for astrophotography focusing

A Bahtinov Mask is a specialized focusing tool that creates a diffraction pattern when placed in front of the camera lens or telescope objective. The pattern helps you achieve critical focus by adjusting the central spike in the pattern to be centered between the “X” formed by the other spikes. The Bahtinov Mask is a highly effective and accurate method for focusing in astrophotography.

Using a Bahtinov mask for telescope focusing

Of all the methods here, this is the one that I have personally seen achieve the sharpest images, and it does so consistently.

7. Hartmann Mask

An example of a Hartmann mask for astrophotography focusing

The Hartmann Mask is another focusing aid that uses two or more small apertures to create diffraction patterns. By placing one of these over the aperture of the telescope and adjusting the focus until the patterns merge into a single sharp point, you can achieve optimal focus. While the Hartmann Mask is less popular than the Bahtinov Mask, it can still be an effective tool for focusing and is much better than attempting to focus with your eyes.

Using a Hartmann mask to focus your telescope

The nice part about the Hartmann mask is that anyone can make one very quickly and inexpensively. While the Bahtinov mask is more effective in my experience, and the method I always use, it requires a much more complex and precise mask which is not that easy to make.

8. Autofocus

I should start by saying that autofocus in astrophotography does not mean using your camera’s autofocus, that absolutely does not work. Autofocus in astrophotography requires a combination of motorized focusers and specialized software. The software measures the size of stars in the image and adjusts the focus accordingly. Autofocus systems can provide highly accurate and consistent focus, particularly for long exposures and high-resolution imaging.

This is the method used by serious astrophotographers as the focus can not only be set to the sharpest possible focus but can be continuously adjusted over long periods of time to compensate for changing atmospheric conditions, temperatures, etc. It can also be set to sound an alarm and stop taking images when the conditions deteriorate to where your images would no longer meet your quality standards.

Focusing Tools and Accessories

In addition to the methods discussed above, various tools and accessories can assist with focusing in astrophotography:

  1. Motorized focusers: These devices attach to your telescope or camera lens and allow for precise, automated adjustments in focus. There are models for specific telescopes like this one for Celestron SCTs for generic models.
  2. Focusing aids: Various focusing aids, such as the Bahtinov Mask and Hartmann Mask, can help you achieve accurate focus quickly and easily. Some you can make yourself, some you can buy for very little.
  3. Software: Astrophotography software, such as Astro Photography Tool and many astrophotography capture packages, can assist with focusing by providing real-time feedback and analysis.

Tips for Successful Focusing

To achieve the best focus in astrophotography, consider the following tips:

  1. Be patient: Take your time and make small adjustments to your focus to ensure the best results.
  2. Check focus regularly: As temperature and atmospheric conditions change, your focus may shift. Periodically check your focus throughout your imaging session to maintain optimal results.
  3. Use the right method: Choose the method that works best for your equipment and conditions. Experiment with different techniques to find the one that provides the most accurate and consistent focus.
  4. Practice: Like any skill, focusing in astrophotography requires practice. The more you practice, the more adept you will become at achieving sharp focus.

Conclusion

Focusing is an essential aspect of astrophotography that can significantly impact the quality of your images. By understanding the various methods and tools available, such as the Bahtinov Mask and autofocus systems, you can optimize your focus and capture stunning images of the night sky. With patience, practice, and the right techniques, you can master the art of focusing in astrophotography and achieve consistently sharp and detailed images.

The biggest jump in the quality of my images, when I was starting out, was switching from using a zoomed-in live view to using a focusing mask. I bought a plastic Bahtinov mask from Amazon and it was easily one of the best purchases I have ever made in this hobby.

A Comprehensive Guide to Polar Alignment for Equatorial Telescopes

Achieving precise polar alignment on an equatorial telescope mount is a crucial step for any stargazing enthusiast, especially when it involves astrophotography. In this guide, we will delve into the importance of polar alignment, the equipment you need, and a step-by-step process to help you align your telescope accurately with the celestial poles. We will be focusing on the procedure for the Northern Hemisphere but other than where you aim your telescope, the basic procedure is the same for the Southern Hemisphere.

1. Understanding Polar Alignment

When using a telescope you may notice that the object you view moves out of the eyepiece rather quickly. This can happen even on telescopes with a “tracking” mount or a mount that is supposed to follow objects across the sky. This is most likely due to your telescope’s polar alignment being off.

Polar alignment is the process of aligning your telescope’s equatorial mount with the motion of the celestial sphere. This is where everything in the sky seems to rotate around a specific point in the sky, the North Star in the Northern Hemisphere. The easy way to think of the celestial sphere and its motion is to think of yourself in a large room sitting in an office chair. Now spin the chair around 360 degrees and it appears as though the room is spinning when in fact, the room is stationary and it is you that is spinning.

By ensuring that your equatorial mount rotates on the same axis as the Earth, you can accurately track celestial objects for extended periods without any noticeable drift. This precise alignment allows for clear, sharp, and stable images in both visual observation and astrophotography.

2. The Importance of Polar Alignment

While many tracking telescopes can keep something in the eyepiece for a short time while you view it, even without accurate alignment. Without accurate alignment, objects may drift out of view, leading to frustration and wasted time.

Polar alignment is convenient for visual astronomy as you can not only view the object for longer periods of time without having to adjust your telescope, but less motion of the object in the eyepiece means you will get a sharper view and see more detail.

While it may be nice for visual astronomy, it is essential for astrophotography as it allows your telescope to track celestial objects with high precision without which your images will be smeared, dim, and contain odd-shaped objects. Improving your telescope’s ability to track objects for extended periods is the cornerstone of astrophotography.

3. Equipment Setup

Before diving into the polar alignment process, it is important to ensure that your equipment is set up correctly. This includes having a suitable German equatorial mount, a reticle eyepiece (one that has crosshairs in it, preferably illuminated), a polar finder scope, and a tripod. Make sure that your tripod is stable, and that your mount and telescope are securely attached.

A polar finder scope, or polar scope, is a small telescope usually built into the center of the telescope’s mount. This location allows for precise alignment of your mount’s center of rotation with the celestial sphere’s center of rotation.

If you are doing astrophotography, you can use your camera instead of the reticle eyepiece to center the telescope on objects.

Some telescopes may not have a polar finder scope and instead use a feature in their controllers that can set polar alignment by using several “alignment stars”. The Celestron version of this feature for example is called All-Star Polar Alignment.

4. Placing the Telescope Mount

The absolute first step is to point the tripod for the mount pointed north. I use a simple orienting compass for this because I don’t like pulling my phone out all the time and find it easier to use. Simply lay the compass on top of the tripod legs and get the front leg (sometimes marked with a N for north) pointing pretty close to north. You do not need to be exact here but do try and get reasonably close as it just makes things moving forward a little easier.

You may notice that the tripod legs of most telescopes extend, and you may be tempted to extend them most, or all of the way to make viewing easier. This can be a mistake as the more extended the legs are, the less stable the mount will be. Now this may not matter much when you are just taking a quick look at the moon or something, it can be a critical factor when doing long-exposure astrophotography.

An often overlooked item is the tightening of all the various knobs and screws. You want to have these as tight as possible, without damaging anything. In other words, you want to use the minimum amount of force to make the knob or screw hold firmly all night. Too tight and you might break something, too loose and things will slip. This may take a little trial and error but it is absolutely worth it.

Ensuring that your telescope mount is level is crucial for accurate polar alignment. An uneven tripod can lead to inaccurate altitude readings and may cause your mount to shift during observation. Many German equatorial mounts have a built-in bubble level to assist with leveling. It’s a good idea to place a level on the tripod before attaching the mount and ensure it’s level on each axis.

Leveling a mount for polar alignment

Before leveling, make sure that each foot of the legs is solidly on the ground. Concrete is the best but you do not want one or more of your legs on ground that may sink or shift even a small amount during observation or taking images as this small amount of motion can dramatically alter your alignment.

I use the bubble level on the mount, if it has one, as a guide. To really level well I make sure the tripod legs are stable and without the mount attached I use a small torpedo level with the ends pointing north and south, level the legs, then switch the level to east and west and re-level. You level the mount by adjusting the height of the legs, which is why it needs to be done in two perpendicular directions.

I repeat this process until the base is leveled in both directions.

5. Aligning with Polaris – The North Star

Finding the north star for polar alignment

For stargazers in the Northern Hemisphere, the North Star, or Polaris, serves as a reference point for polar alignment. Start by roughly aligning your telescope mount in the direction of the North Celestial Pole. You can use the two outer stars in the Big Dipper constellation to help locate Polaris, as it is much brighter than any surrounding stars in the area.

You then look through your polar scope and point it at the north star. Most polar scopes have an image inside of them showing the star pattern so you can align the center of the mount with the stars. This is important because you are aligning your mount with the north celestial pole which is close, but not exactly where the star Polaris is.

In order to move the objects you see in your polar scope to match the image painted inside your scope, you need to use the following two methods.

6. Adjusting Altitude and Latitude

Once your tripod is level, you’ll need to find your location’s latitude and longitude coordinates. Your latitude coordinates will be used to adjust the altitude (up-and-down) position of your telescope mount to align with the North Celestial Pole. This can be easily done by using your phone or tablet as they usually have a compass or GPS feature which will give you this information.


Latitude (altitude) adjustment for polar alignment

Your mount should have a latitude scale on one side of your mount, indicating the current latitude alignment. Adjust the mount’s altitude adjustment bolt(s) to match your current latitude. In the image above, the bolt on the left side bottom of the image is turned clockwise to raise the altitude (increase the latitude shown on the scale) and counter-clockwise to lower it.

No telescope I have ever used had an accurate latitude scale, but it usually gets me close enough to see Polaris in the polar scope. I can then fine-tune the latitude adjustment while looking through the polar scope.

7. Adjusting Azimuth

After setting the correct latitude, you’ll need to adjust the azimuth of your mount (left and right) to fine-tune the polar alignment. Your mount should have azimuth adjustment knobs that can be loosened and tightened to move the mount left or right. Keep adjusting the knobs until Polaris appears in the approximate horizontal plane, as displayed in your polar scope, alignment app, or other software.

Azimuth adjustment knobs

When you are done with this step, if your polar scope has an image of the stars around Polaris and a dot or crosshairs where Polaris should be, Polaris should be on that dot or in those crosshairs. Keep in mind that if, for example, your polar scope shows the constellation Cassiopeia, it is not necessary to have both Polaris where it is supposed to be, and Cassiopeia where it is shown. Stars and constellations other than Polaris are there just to help you find your way.

8. Utilizing Polar Alignment Apps and Software

To make this process easier, or if you do not have a polar scope with an image in it, consider using a mobile app or software that provides the exact position of Polaris relative to the North Celestial Pole. Examples of such apps include PolarFinder for Android users and Polar Scope Align Pro for iPhone users.

These apps use your device’s GPS to calculate the position of Polaris based on your location. You can then adjust your telescope mount accordingly to mimic the location displayed in the app.

9. Advanced Polar Alignment Techniques

For those looking to achieve even greater accuracy in their polar alignment, there are additional methods and tools available. Some of these techniques include:

These advanced methods can provide improved auto guiding (a method using a camera to help automatically adjust the tracking of your mount to increase its accuracy), allowing for longer exposures without tracking errors.

10. Final Thoughts and Tips

Achieving precise polar alignment is an essential skill for any stargazing enthusiast, particularly for those interested in astrophotography. With practice, you’ll quickly become adept at aligning your telescope accurately with the celestial poles. Remember to start with a solid foundation and accurate leveling to make sure all your hard work lasts all night long.

There are a lot more adjustments and fine-tuning that can help get the most out of astrophotography. Stay tuned here for more on that, or you can find all of this and more in the excellent book Getting Started: Using an Equatorial Telescope Mount by Allan Hall.

Gskyer telescopes are best sellers on Amazon?

So why are Gskyer telescopes best sellers on Amazon? Does anyone know? Are they really good? Do they provide great bang for your buck? I think I know the answers so let’s dig in and find out.

Gskyer Telescopes on Amazon

Let’s start by looking at the fact that, as shown in the image above, Gskyer telescopes are selling very well on Amazon. While the placement may change, they are always in the top. You can click on the image above to see the current rankings. And look at those reviews! 4.3 stars, 4.5 stars, and another 4.5 stars, they must be awesome! Or maybe not.

Why does it matter if Gskyer telescopes are at the top? I mean if it gets people into astronomy, isn’t that a good thing? Yes and no.

The history behind Gskyer telescopes

Many years back, Gskyer was the name of a German optics company that made some pretty good products. As things changed they fell on hard times and wound up closing up shop. I can’t find a lot of good information on the German Gskyer telescopes so I can not be any more specific, sorry.

The point is that they were pretty good, and pretty well known, but closed up shop. When that happened the name went up for sale with everything else. That name, as far as I can tell, has been bounced around Asian owners like the proverbial hot potatoe until a company decided to do what the Chinese do best, buy cheap stuff, rebrand it, mark it up, and sell it.

That seems to be what happened here. If you look around you can see a lot of products that look just like the Gskyer telescopes but with different brand names stamped on them. That is because they are all sourced from the same factory. Some may have minor differences or come with different accessories, but the base item is the same.

Just because Gskyer telescopes are sourced from the same place as other brands don’t make them bad, lots of people do that today. Let’s see if they are actually any good.

Are Gskyer Telescopes actually any good?

I managed to get a couple of Gskyer telescopes including their current #1 Amazon bestseller, the 70mm AZ70400 refractor. I put them through their paces for a couple of weeks to see how they stack up. Everything I talk about here is a comparison to other telescopes in their price range. I am not comparing a $99 Gskyer telescope to a $5,000 Williams Optics.

Gskyer telescopes AZ70400

The 70mm is exactly what you would expect, cheap. It is mostly plastic, and not really good plastic. The first time you tighten an eyepiece in the diagonal the screw will either strip (mine did) or crack. Either way, rendering the screws holding it together useless.

Looking through them is about what you see in any cheap 70mm plastic toy. With a scope this small it is hard to mess things up too much, I mean is there much difference between looking through a dollar store brand cardboard paper towel roll and a Bounty cardboard roll? Not really.

It does function, so I have to give them that. Gskyer telescopes have a pretty good assortment of accessories so you at least get to play with things. Their smartphone mount is pretty cool although it only works with their horrible eyepieces so that’s kind of a let-down. The Barlow, like all Barlows with these cheap telescopes, is pure garbage. They do include a little Bluetooth remote trigger for your phone to take pictures and that is nice.

If I was wanting to the Gskyer telescopes 70mm refractor as a travel and daytime spotting scope, it isn’t bad, but you can get better for the same or less money.

How about their top-of-the-line “professional” 130mm Newtonian on an equatorial mount?

Gskyer telescopes sky explorer 130eq

It might be a professional seller, but with an absolute joke of a mount, even the pretty decent optical tube of the Gskyer telescopes sky explorer 130EQ just can’t seem to provide good views.  Maybe if you set it and not touch it for ten minutes you can get a stable image, but then the eyepieces are so horrible you have a hard time keeping your eye centered long enough to see anything.

At this price point, there are just too many competitors from companies like Celestron, Meade, and Orion to even consider Gskyer telescopes as anything other than a way to throw away your money.

Support for Gskyer telescopes

Gskyer telescopes do actually have a website, it is, as you might guess, www.gskyer.com. You will find telescope basic information, including on some models not currently sold in the US. It is also in Chinese. What you will not find is any kind of help in assembling, troubleshooting, or using their telescopes. You can call them (which would probably cost more than the telescope) or you can email them at gskyer@163.com.

I know what you are thinking, 163.com? What the heck is that? That is basically like Chinese Yahoo free email. Yup, Gskyer telescopes are using the Chinese equivalent of a free Yahoo email address as their primary business contact. That instills confidence, right?

It is so bad that other people have had to step up to try and help all these people who bought Gskyer telescopes and can’t figure out how to use them. One of the authors of astronomy and astrophotography books I recommend here on Astronomy Online, Allan Hall, has created basically a big, online, Gskyer telescope manual over at GskyerTelescopes.Net.

He has loaded it with reviews, how-tos, downloadable PDFs, and a ton of videos from his YouTube channel (which isn’t a bad place for beginners to check out). The website seems pretty new but it looks like he is doing a pretty good job at providing some great information to the beginners stuck with these Gskyer Telescopes.

While looking there you will also see he has ads for his books over on the side, and I can’t fault him for that. Why not try and make a buck while helping people. At least he seems to be actually trying to help first, then making a couple of bucks second. There are others that I won’t give the courtesy of a link to who are providing no help at all, just trying to fleece these poor people. Do a Google search and you will find them. Shameful.

So how do you explain the great reviews?

Well here is the thing, if you run the item through fakespot.com you get this…

Gskyer telescopes reviews on fakespot

What does that mean? It means that Gskyer telescopes have a large number of questionable reviews. Only approximately one-third of the reviews are considered reliable and most of those are probably the people who gave it one and two stars and people who have nothing to compare it to.

I can hear you now, that is just fakespot, they could be wrong, it happens you know. OK, fine, let’s try someone else, how about reviewmeta.com?

gskyer telescopes review inspection on reviewmetaWell, that shows 64% unnatural reviews (probably fake) removed. So again, we have a very high number of reviews that are probably not authentic. I smell something and it isn’t the anchovies on my pizza.

I should mention here that I never put all my faith in these review checker websites. I use them as a tool to add to the information I get from other sources before I make my judgments. There are legitimately good products that have large numbers of suspect reviews, I just don’t believe that Gskyer telescopes are one of them.

Conclusions

After all of this, I think we know what is going on with Gskyer telescopes. Someone bought a name from a German optics company with a good reputation, bought a ton of cheap telescopes, had their name plastered on them, then used the name they bought to sell them at huge markups to unsuspecting customers looking for a deal.

My recommendation is to stay away from Gskyer telescopes, far far away. You can get better scopes for the same or less money from Celestron, Meade, and Orion along with support from people in the United States who will actually try and help you.

And this is why I believe Gskyer telescopes are best sellers on Amazon.

Orion Astroview 90mm EQ Refractor, best beginner telescope ever?

Is it possible that the Orion Astroview 90mm EQ Refractor could be a better beginner telescope than the always recommended 8″ Dobsonian? That depends largely on who you ask, and who the beginner is. Let me explain.

Orion Astroview 90mm Refractor Telescope

First, I want to talk about the telescope itself. Orion Telescope has been making the Orion Astroview 90mm, or a version of it, since at least the 1990s. I know this because I own an old version, the Skyview 90mm. It was the same basic scope with a beefier mount. It was an accidental acquisition, but a happy one. That 90mm has turned out to be my favorite grab-and-go scope of all time.

Why is it important how long the Orion Astroview 90mm has been made? Because that gives them time to refine it, improve it, fix any faults. In addition, if you have had production of a product for over 30 years, that speaks volumes to its desirability. Want proof? Try to find one in stock during the holiday season, I dare you.

It also means that given how long the Orion Astroview has been in production, you can find a ton of 90mm refractor telescope reviews about it.

So why is the Orion Astroview 90mm so popular now, and for so long? Because it is the perfect combination of quality, ease of use, and giving excellent views. Let’s look at each of these things and get a better understanding.

Quality

When you unbox the Orion Astroview 90mm the first thing you will note is that it is metal. There is very little plastic in the box. Not just the tube, tripod, finder holder, mount, eyepieces, tube rings, focuser, and eyepiece tray, but a lot of the connecting stuff too.

So who cares if the Orion Astroview 90mm is metal? You do! As a general rule metal construction means it will last longer and provide more stability. Lasting longer means you can amortize your purchase over a longer period of time making it cost less per year of ownership. More stability means sharper views (you don’t like fuzzy and blurry views, do you?).

Everything on the Orion Astroview 90mm has good clearances, fits tight, and is easy to adjust. Knobs are the right size to make use easy and are right where they should be.

Want to swap out the viewfinder scope? Loosen one thumbscrew and slide it out of the standard vixen style dovetail then slide in a different one. Easy as pie and solidly connected.

The focuser on the Orion Astroview 90mm is, of course, metal. Yes, there are plastic knobs, but the bulk of it is a nice chunk of metal. This added rigidity means you can easily put a nicer diagonal and the largest 1.25″ eyepiece you can find in it and it will remain rock solid. In addition to its material, it is also very well made. Racking the focuser in and out is smooth and as precise as you could want in a beginner scope. It goes where you want it to go, and stays there when you let go.

Looking down, the mount might look small, and it is, but it too is all metal allowing for it to be remarkably strong and stable for its size. While no match for an EQ3/CG4 or equivalent mount, it does an excellent job with the Orion Astroview 90mm it comes with.

The same holds true with the metal legs bundled with the Orion Astroview 90mm. Not near as nice as the 1.25″ or 2″ tubular steel you find on the EQ3/CG4 mounts, but more than sufficient to provide excellent stability. This is particularly true if you resist the urge to fully extend the legs.

Views

The Orion Astroview 90mm features an excellent objective lens for its price, providing remarkably high contrast views. Yes, there is some chromatic aberration that displays a colored glow around bright objects such as bright stars, planets, and the moon. It is not that bad and has little to no effect on your viewing of the detail of the moon and certainly no effect on nebulae or clusters.

This chromatic aberration is not unique to the Orion Astroview 90mm, but all refractors without serious correction (read that as serious expense). Just like reflectors have their drawbacks (coma, diffraction spikes, astigmatism), so do refractors.

The eyepieces that come with the Orion Astroview 90mm are very impressive for the money. No, they are not Televue Ethos eyepieces, just Orion Sirius Plossls. But for the money in a beginner kit, they are quite good. Far better than the ones you normally get in kits.

When you couple the Orion Astroview 90mm’s excellent objective lens with these eyepieces, you get crisp, high-contrast views that rival scopes costing much more money. I like that!

Ease Of Use

Sure, a telescope can be made like a Swiss watch and provide views like the Hubble, but if it is a pain in the rear to use, who is going to use it? Fortunately, that isn’t the case with the Orion Astroview 90mm. About the only thing easier is a pair of binoculars.

Seriously though, assembly and use are very easy with excellent instructions, in English, in a full-size booklet. The Orion Astroview 90 eq manual has all the information you need without a ton of ads or other junk you see in other manuals.

Like all refractors, you point the Orion Astroview 90mm’s big end at the thing you want to look at and put your eye on the eyepiece on the little end. OK, I am being a little over-simplistic but it almost is that easy.

Cooldown is fast with this Orion 90mm telescope, way faster than my reflectors. This means I can take it out and start viewing very fast. No fans are needed here.

The whole thing comes apart into three pieces for travel; the tube, the mount, and the legs. Putting these three things together or taking them apart is fast and easy. Each piece is fairly light and easy to store with the mount and its counter-weight being the heaviest. I usually throw the mount and weight in the floorboard with the tube and legs in the rear seat, if I disconnect the legs from the mount at all (which I rarely do). This makes the Orion Astroview 90mm extremely portable.

Orion Astroview 90mm completely disassembled

You can even get the Orion Astroview 90mm eq refractor telescope kit which includes a few filters (the moon filter is handy), a nice moon map, and an excellent little planisphere. It used to come with their DeepMap 600 which I dearly love. It is still worth purchasing separately if you ask me.

Compared to an 8″ Dobsonian

Now that you know more about the Orion Astroview 90mm, how does it stand up to the classic 8″ Dobsonian that everyone else seems to recommend? Let me run through the reasons I think it is a better choice for many people:

  • Faster cool down – It can take 30 minutes to 2 hours for an 8″ dob to cool, this thing is ready to roll in ten minutes.
  • Easier transport – Drive a MINI Cooper or other small car? Heck, I have carried my Orion Astroview 90mm on a motorcycle! Try that with an 8″ dob.
  • Easier to handle – If you are small, ill, disabled, or old, the weight and size of the dob can be just too much. The Orion Astroview 90mm is lighter and designed to be easily and quickly broken down into much smaller and lighter pieces.
  • Faster setup – Two thumbscrews and the scope is off, throw the two pieces in my car and I am gone.
  • No maintainence – Collimation? I don’t need no stinkin collimation!
  • No expensive eyepieces required – Fast dobs often require much more expensive eyepieces to give reasonable views due to their fast focal ratios. The Orion Astroview 90mm is F/10, cheap Plossls will work great!
  • Easier object sighting – Point the big end……. seriously, forget the viewfinder, sight right down the tube. It doesn’t get any easier than that.
  • Better views (to a point) – Higher contrast, no coma, diffraction spikes, or astigmatism (usually).

Does that mean the Orion Astroview 90mm is a better scope for every beginner? Absolutely not. There is no perfect telescope for everyone at any skill level. But I firmly believe it is a better beginner scope for some people.

The dob will collect more light than the Orion Astroview 90mm so if you are going for really faint nebulae it might be a better choice. Honestly though, that only holds true if you have pretty dark skies and the majority of beginners start out in their back yard or local park with horrible sky conditions.

I hope you enjoyed Orion Astroview 90mm Review!

Astrophotography How To – Part 2

Astrophotography How To Part 2: Getting going

In our last article, Astrophotography for Beginners Tutorial part 1, we mainly talked about what equipment you needed to get started while in this part you will find more information on setting up and collecting images. Packed with lots of astrophotography how to information and astrophotography tips, this should get you taking images in a hurry.

Astrophotography How To Section 2: Camera Control Software

There are a lot of different software packages that do different things but we will start with camera control.

There are several types of camera control software out there including, free, dirt cheap, medium functions and best. Below is a chart showing some of them and their functions:

Shutter <30 sec Shutter >30 sec Image Download Live View Focus Assist Auto Stretch Dither Processing Canon

DSLR

Nikon

DSLR

CCD Price
DSLR Shutter Y Y N N N N N N Y Y N Free
Images Plus Y Y Y Y Y Y Y N Y Y Y $79
Nebulosity Y Y Y Y Y Y Y Y Y N Y $80
MaxIm DL DSLR Y Y Y Y Y Y Y Y* Y Y N $399
MaxIm DL Pro Y Y Y Y Y Y Y Y Y Y Y $499

Shutter <30 sec means it can trip the shutter for exposures of 30 seconds or less, but not more. This can start you out but you will not get very far doing detailed faint objects with this.

Shutter >30 sec means it can do the previous and also do exposures of more than 30 seconds including many minutes. This is pretty much required to do real DSO work.

Image download means it can download the image from the camera and display them on the screen as they are shot. This is important because it allows you to see what is going to be on your images without having to look at the tiny LCD screen which not only is hard to do because it is so small and so low resolution, but also because it will destroy your night vision.

Live view means you can see what the camera is looking at live while in live view mode. Useful for coarse focus adjustments and sometimes to make sure your target is where you want it to be.

Focus assist means the software has routines to help you perfect your focusing. I don’t really use this, I use a focusing mask which I will describe later.

Auto stretch is a function where the image has the histogram automatically stretched so you can see faint targets much better. This can really help with really faint objects.

Dither is the capability to move the image a few pixels between shots to increase signal to noise ratio.

Processing means the same software can both control the camera and do post processing of the image. Items with a * mean partial processing is possible. We will discuss stacking and processing later.

Canon DSLR, Nikon DSLR and CCD means it can control those types of cameras.

Last but certainly not least is price.

These are certainly not your only choices for camera control but are a pretty good sampling.

With Canon cameras you typically will have one USB cable that runs from your laptop to your camera for control and download of images. The good news is it is cheaper and easier to use this way. The bad news is that it is slightly slower than Nikon downloads since it uses a separate cable for transfer and for shutter release so it can send two signals at the same time.

Speaking of Nikon, to do longer than 30 seconds you will need a special shutter release cable for these with either an IR connector at one end or a GPS plug. The difference is in the camera. Most very low end Nikons do not have a GPS port so must use the IR remote. Higher end/newer cameras (D90/D7000) have the GPS port and can use a cable that connects there. You can get the cables from Shoestring Astronomy. Be sure you get a long enough one.

Section 3: Mount Control Software

This is a critical component to making your evening efficient and enjoyable. The first piece of software I recommend is EQASCOM. This is a little free suite of software that allows other software to communicate with your mount, and even to slew your telescope with a wireless gamepad if you choose.

EQASCOM runs on a platform called ASCOM, which is a freely downloadable piece of software that just about every manufacturer of astronomy gear has drivers for. This allows everyone to talk together including mounts, guide cameras, CCD cameras, focuser controls, dome controls and a myriad of software all at the same time.

C:\Users\Allan\Documents\Astronomy\Primer\ascom.jpg

Figure(8). Illustration of how everything communicates through EQASCOM and ASCOM.

EQASCOM will allow you to interface planetarium, planning and other software with your telescope. For example, software such as TheSkyX, Starry Nights, Red Shift, and Stellarium allow you to look up targets and slew to them. It is also useful for aligning your telescope.

EQASCOM allows control of your guiding as well so instead of having to connect a cable from the ST-4 port on your guidecamera to your mount, you can use what is called “pulse guiding” with EQASCOM. One really neat thing here is the ability to control something akin to a gain control for the guide signal making it move the mount more, or less, depending on what you want. This comes in very handy in some situations where your guiding software takes forever to calibrate.

Another really nice feature of EQASCOM is PEC training. In the previous section on mounts we discuss what PEC is and how software is used to find, strip out and finally make PEC adjustments. EQASCOM’s PECPrep program can provide the last two of those by providing a program that reads and filters the log file from guide software such as PHD and then outputs a correction file that EQASCOM can directly use to provide the corrections.

My setup allows me to connect to the scope with TheSkyX and instead of using the hand controller to do alignments etc I do it all through software. I pick any three targets (and it could be two, ten, whatever) in the sky and tell it to slew to the first one. I then use my wireless gamepad to center the object in my camera, and then in TheSkyX I click on Sync. I repeat this two more times and then I have a very good alignment. One advantage this has is I can sync on ANY three objects, planets, the moon, stars, whatever. I am not limited to objects in the hand controller’s alignment database. One trick is to make the objects rather far apart and make sure two are on opposite sides of the meridian.

I am going to throw planetarium software in here too since it is used primarily to drive the scope and see where I am and what I am looking at.

Stellarium is a great package to get your feet wet with. Since it is a free download and fairly small it is a great place to start. If you get semi-serious about imaging you will probably want more. The top of the line is TheSkyX Professional at $329, next down is TheSkyX Serious Astronomy Edition at $144, from there your next best bet would be one of the Starry Night versions ($79-$249), and then Stellarium. Now you may have noticed that I rank TheSkyX SAE above Starry Night’s most expensive version, and indeed I ‘upgraded’ from Starry Night Pro Plus 6 to TheSkyX SAE. TSX is just that good. I fully plan on going to the pro version once other things settle down, it is a great package that will do everything you ever wanted and then some.

Section 4: Guiding

This section is about guiding camera, scopes and software, all in one. It is really hard to separate one from the other. Let’s start with an understanding of guiding accuracy as it is one place I have seen a lot of misconceptions.

To find the pixel accuracy of a given setup for guiding you use this formula:

TelescopeResolution = CameraPixelSize / FocalLength * 206.265

So in my case it works out to my main scope(110mm, 770mm FL):

4.78/770*206.265 = 1.28ArcSec/Pix

And my guidescope (80mm, 400mm FL):

5.2/400*206.265 = 2.68ArcSec/Pix

This means that when my guider is off 1 pixel, it moves the mount 2.68 Arc Seconds. This in turn moves my main camera 2.09 pixels. My guiding is pretty accurate with all the tweaks I have done so being off more than a pixel is rare, which means my main scope normally moves less than 2 pixels at any given time.

Decreasing the focal length of my guidescope (for example using the Orion Mini Guider) would increase the difference to 5.17 pixels and cause a huge loss of detail and much larger stars. The trick is to keep the error difference down to a couple of pixels if you can and to balance that with the amount of light gathered by the diameter of your guidescope.

This formula is highly dependent on your camera, telescope, guidescope, and guidecamera so what works for me may not for you. Be sure to run the formula and keep the difference between your guidescope and main scope to a minimum.

Next we come to guidecameras which has something to do with all of this because it is the pixel size of the guidecamera that helps us dictate the focal length of our guidescope and its accuracy. A good general purpose guidecamera is the Orion Starshoot Autoguider and indeed it is one of the most popular cameras out there. Another choice is the Orion G3 monochrome as it would provide more possible guide targets since it is cooled and sees less noise. Some of the more popular choices are listed here:

Pixel Size Cooled Weight Resolution Price
Orion StarShoot AutoGuider 5.2 N 4oz 1280×1024 $279
Orion G3 Mono 8.6 Y 12oz 752×582 $499
Fishcamp Starfish 5.2 Y 11oz 1280×1024 $995
Meade DSI III 6.45 N 11oz 1360×1024 $799

Again, this is only a sampling and there are other alternatives such as a modified webcam. I have no problem with cheap homemade items like the homemade webcam, as long as the parts + reasonable labor do not exceed what I would have spent on an actual guidecamera and provide equal results. In this situation I do not believe it does so I run the Orion SSAG.

We now come to guiding software and the de-facto standard, PHD by Stark Labs. Since it is the standard most people seem to use, it is free, it works with just about any camera you would ever want to use, and is supported by almost every piece of software that interfaces with guiding, I saw no reason to explore other options. Download it, install it, use it.

If for some weird reason PHD does not work well for you a couple of other options are Guide Dog and Meta Guide which I believe are both free as well.

Section 5: Tablet Software

Tablets, specifically iPads, are so prevalent in today’s world that I just could not leave them out. Too many times I have enjoyed both visual and AP with the help of my iPad. From navigating the night sky, to seeing the moons of Saturn orbit the planet in a planetarium, to just watching videos while my scope imaged, the tablet has become a staple when I go out.

So why a tablet? One thing a laptop can not do well is be lifted up and compared to the sky, and then move in real time as you move it against the sky. Tablets excel at this. You have no idea how cool it is to put a moving sky chart up to the sky and move it around to see what all is in that area of the sky. This is absolutely wonderful for visually exploring with binoculars or a telescope, or can help you plan targets that are in the same area you are already shooting in.

Like desktop planetarium/star charting software there are several options for this function on tablets. To start with there are programs such as Star Walk ($4.99 iPad version) which is a planetarium and planning guide which lists all of the Meisser objects and some others. The database is small but the graphics are rich, and for the money, this is my choice of apps to start with. It also has a wonderful feature called Sky Live which shows you the rise/set times of the Sun, Moon, Venus, Mars, Jupiter and Saturn at a glance as well as their angle in the sky, and phases of the moon.

Next up on our list is SkySafari Plus ($14.99, iPad/iPhone/Android, native on all). This app lists 2.5 million stars, telescope control, and 31,000 deep space objects.

From there we can jump to SkySafari Pro ($39.99 iPad/iPhone/Android, native on all) which boasts one of the largest stellar databases of any planetarium program for any platform (including PC/Mac!) This is the app you will eventually wind up with if you are serious.

If you are less interested in having a star catalog but would like to explore our solar system, watch space related videos and keep up on the latest in the space program, the Nasa App HD is a wonderful little app, and its free! It also has a detailed satellite tracker.

Want to control your telescope with your iPad? No problem! The same company that makes SkySafari, Southern Stars, also makes SkyFi, a wireless telescope controller which they license to Orion Telescopes as the StarSeek Wi-Fi module. Not into wireless? Try their SkyWire USB product.

Section 6: My setup procedure

Sometimes it is difficult to know what to do, and what order to do it in so I thought I would offer this step by step process. Feel free to use it, modify it, and abuse it:

  1. Setup and level tripod pointing north
  2. Install mount and tighten it to tripod base
  3. Install telescope to mount
  4. Attach dew heaters
  5. Attach power cables, data cables and hand controller
  6. Attach filter wheel and field flattener
  7. Attach DSLR
  8. Attach cables
  9. Balance scope
  10. Polar align scope then set to home position
  11. Setup table for laptop and laptop
  12. Plug in cables to laptop
  13. Plug in all power cables
  14. Turn on dew heaters, mount, laptop
  15. Setup folding chair
  16. Input date/time/location information into hand controller, then switch to PC connect mode
  17. Launch PHD Guiding software and connect to guidecamera, this launches EQASCOM
  18. Set PHD to 2 second frames and take darks
  19. Uncover guidescope and telescope
  20. Reset wireless gamepad and test connection
  21. Turn on DSLR
  22. Launch Images Plus and connect to camera
  23. Launch TheSkyX and connect to telescope
  24. Turn on Orion EZ Finder Deluxe
  25. Pick three objects to align on by looking at the sky and finding three easy objects, the third should be a very bright star to end on
  26. Tell TheSkyX to slew to first target
  27. Turn on Live view in Images Plus and click the Display Crosshairs checkbox
  28. Use the wireless gamepad to slew until first target is exactly centered in crosshairs
  29. Tell TheSkyX to slew to second target
  30. Use the wireless gamepad to slew until second target is exactly centered in crosshairs
  31. Tell TheSkyX to slew to third target
  32. Use the wireless gamepad to slew until third target is exactly centered in crosshairs
  33. Launch AlignMaster and go through alignment process
  34. Switch to EQASCOM interface and clear alignment data
  35. Repeat steps 25-31
  36. Turn off Orion EZ Finder Deluxe
  37. Place Bahtinov mask on telescope
  38. Use live view at maximum zoom to focus
  39. Turn off live view and take a 4 second exposure at ISO800 to verify focus(double that when using narrowband filters), prefix filename with “focus-“
  40. Tell TheSkyX to slew to first target of the evening
  41. Fire off a 30 second exposure at ISO 3200 to verify target placement and calculate first exposure, prefix filename with “targetname-“ where targetname is something like M15 for Meisser 15, or NGC1805
  42. Test exposures until I get the right one
  43. Set exposure properties and number of exposures for time allotted, including stopping for meridian flips where required
  44. Once exposures are complete, install flat frame light source and start exposing for flats, prefixing filenames with “targetname-flat-“
  45. Remove flat frame light source and start exposing for bias frames, prefixing filenames with “targetname-bias-“
  46. Tell TheSkyX to slew to the second target of the evening…

Note there are no darks as I take them generally at home, in the refrigerator during the winter, in the house in spring and fall, and on the back deck in the summer. I use the same dark frames for multiple targets as long as the temperature, ISO and exposure duration is the same.

Section 7: Exposure considerations

The first thing you have to understand is image bit depth and dynamic range.

There is no better way to understand these concepts than graphics, so lets look at some and see what is going on. I want you to understand that these are just for this discussion to make it easy for you to understand, they have no basis in AP at all.

Every color is made up of combining red, blue and green colors into one full color image. Each color is represented by a scale that shows its bit depth. The image below we will call a 6 color grayscale because it shows 6 shades of gray.

C:\Users\Allan\Documents\Astronomy\bitlevels1.jpg

Figure(9). 6 color grayscale.

Now for the sake of conversation lets say that the numbers at the top represent the percentage of light that has come into each pixel of your camera. When the number of photons hitting the pixel max out that pixel’s ability to absorb more photons (this is called the well depth) then it is at 100%. Let us further assume that your exposure has the pixel we are talking about saturated at 15%. In the image above 15% is clearly in the left hand solid black region so 0% up to 19% is all one color, black. You might as well not have even opened the shutter.

C:\Users\Allan\Documents\Astronomy\bitlevels2.jpg

Figure(10). 12 color grayscale.

In this image if we talk about the same pixel receiving the same amount of light, 15% of saturation, we are clearly in the second section which is very dark gray. When you stretch the image and increase the contrast you can begin to pull out some separation between the first and second sections, or very dark gray and black.

So as you can see, the higher the bit depth (number of colors), the more likely you are to be able to differentiate between two different shades, and the more likely you are to pull out your target from the background. It should be clear that you want the highest bit depth you can get. Bit depth is measured a little different, 1bit is 2 possible colors or shades of a color, 2bit is 4, 3bit is 8, 4bit is 16 and so on.

Dynamic range is the camera’s ability to differentiate between different light values. Since a DSLR uses what is called a Bayer Matrix where a group of pixels is combined to produce one color, one red pixel, one blue, and two green we are talking about each pixel’s ability to respond to a specific range of brightnesses in that particular color.

Why this concerns us is that dynamic range is reduced as ISO is increased which causes a problem with exposures. When you increase ISO, sensor gain noise is increased, but as you increase exposure time, thermal noise increases. Danged if you do, danged if you don’t. But then there is dynamic range to consider. This leaves you with the best option, use as long exposures as you possibly can with a low ISO to increase your dynamic range and ignore thermal noise which will be largely filtered out with darks.

Here is a chart that shows how the ISO affects other aspects of a Nikon D7000:

ISO 100 200 400 800 1600 3200 6400 12800 25600
DR 14 12.75 11.75 10.75 9.75 8.75 7.75 6.75 5.75
SNR 40db 38db 34db 32db 28db 26db 22db 19db 15db

Now as we can see, at ISO 100 each pixel in the camera has 14 bits per color component (R, G, and B). Each bit has two options (on=1 or off=0) so this means there are 2 to the power 14 (=16,384) possible shades for each color component. Now each final pixel is a combination of three colors so 16,384 x 16,384 x 16,384 = 4.3 trillion colors. Now take that down to the lowest number of 5.75 and do the same math, 2 to the power of 5.75 is about 54, and 54 x 54 x 54 is about 157,000 colors.

This clearly shows that the higher the ISO, the fewer colors you have, which we already showed makes it much more difficult to stretch detail out of the image.

So should you always shoot at ISO 100? No. You need to get a balance between realistic length exposures and maximum dynamic range. You can first figure out how long of an exposure you can get on your mount without any issues and at least a 90% keeper rate, and then figure out how long you want to be there, heh.

If you look at the previous chart you will also notice the last row which shows SNR, or Signal to Noise Ratio. This becomes very important because we are trying to pull a weak signal out of a universe of noise. I don’t really go into much detail on it because it should be a relatively simple concept, and even if not, it changes just like dynamic range and has the same net effect.

For most objects I have found that ISO 800 on the D7000 is fairly acceptable, this gives you to about five billion colors total. I will say however that as I am getting better at stretching images and coaxing detail out of them I am starting to shoot a lot more at ISO 400 for about forty billion colors, or eight times the number of colors.

Using the ideas in Part 1 of my series you need to shoot to get the histogram on the left hand side of the graph but with clear separation from the left edge, this provides a good signal while minimizing any skyglow from light pollution and then adjust your ISO to the lowest setting you are willing to put up with that can give you reliable good images.

Section 8: Post processing

Once you have all your images you need to process them to make one final image. While this topic could easily fill multiple full blown books my goal here is just to give you enough to get started and let you add to your knowledge and skillset as you move along in your AP journey.

The first thing you have to do with the images is stack them. Very basically what this does is take a specific pixel in each image and see how it changes, or doesn’t change, from one image to the next. If the values for this pixel do not change, or change very little then the value is left alone. If the value changes in one image drastically such as when a satellite passes through the image, then that is ignored and the average value for the rest of the images is used instead. If the value changes randomly from image to image, it is considered noise and either rejected or averaged out. Remember, this is a very basic overview, there are many types of stacking which do wildly different things but the general idea remains the same.

What this has the effect of doing is removing noise and increasing the signal to noise ratio to help you pull out a faint object from a fainter background. As we discussed in Part 1 this becomes easier with more frames for the software to look at in order to figure out what is noise and what is signal, to a point. A good place to stop for most objects is about 20 images. Fainter objects and objects that require more total exposure may require more images.

Recapping from Part 1 why 20 images is about right is because improvements to the SNR of an image is inversely proportional to the square of the number of images. 2 images gives you a 100% increase in SNR over 1 image, 4 gives you a 50% increase over 2, 16 gives you a 25% increase over 4, 32 gives you a 12.5% increase over 16, and so on. Note as you double the number of images, the percentage increase in your SNR is halved. This also explains why with very faint objects, you need to capture as many frames as you can stand. For example the last time I shot the Iris nebula, NGC7023, I shot 70 lights of which I kept 69.

This number applies to all images, lights, darks, flats and bias. Only lights really need to be increased past this number. I typically shoot for 25 of every type except lights for which I start at 20 and go up based on my needs for that specific target. I picked 25 because it is a good easy number that allows for several failures before I drop below 20 of each type.

Virtually everyone I know started stacking with a program called Deep Sky Stacker (DSS for short). Partially because it is an excellent starter program for this use, and partially because it is free.

DSS allows you to take all your lights, darks, bias and flats and combine them into one image. I will note here that DSS is NOT very good at anything but stacking so do not do any stretching, saturation boost, etc with it. A great thing about DSS is you can get pretty reasonable results from most targets by using the suggested stacking parameters. The developers have done a good job is making recommendations which you can follow along with. Once you are done here you can save the output as a 16bit TIF file for further processing.

Now here comes a problem. We need to take this 16bit TIF and stretch it in a graphics program. The problem arises in that we need a 16bit editing package and that means commercial applications. Photoshop ($699) of course will do this without problem, Photoshop Elements ($99) can do this with enough plugins and tweaking, I have heard that Corel Paintshop Pro ($40) can handle 16bit images but I have not tried it. Gimp, the popular freeware image editing software for Windows/Mac/Linux is only 8bit from what I have seen so is not suitable. I have found that the majority of people doing this who are fairly serious wind up using Photoshop. I know, that’s a lot of money, but what are you going to do.

There is another option to some of this and that is a dedicated astronomy post processing (PP for short) application such as Images Plus ($179) or MaximDL (starts at $299). These applications can do your stacking, stretching and many other functions all in one application. One advantage here is that some PP apps do the stacking and stretching in 24bit or even 32bit data so they can reveal more detail than even working in Photoshop!

Other things that dedicated AP PP apps provide is typically gradient removal for images that are shot into light domes or near light pollution, deconvolution to really bring out details in galaxies and nebulas, background neutralization to give nice even neutral colored backgrounds, and color calibration so that your stars have some semblance of color to them and targets don’t come out some weird color. This of course is just the tip of the iceberg so to speak, there is so much more that can be done in a dedicated AP PP app.

Eventually, if you are really serious about AP, you will have some form of dedicated PP application such as Images Plus and Photoshop, you may even have something like Adobe Lightroom ($149) to organize your images, make them easier to export to web/photobucket/blogs/etc, and to make cropping for specific sizes and ratios the easiest thing you have ever seen.

A typical workflow may consist of stacking/stretching/sharpening and noise reduction in Images Plus, then copy that image into Lightroom. Now it is cropped, has the clarity boosted slightly and maybe a little bit of saturation boost, then click on Edit In Photoshop. Once there any final tweaks are performed and it is saved back to Lightroom. Then the image is exported to whatever final destination you desire (for example, right click on the image, click Export, Click Photobucket, select the gallery, then click export).

When you first start out you will undoubtedly stack your images, give them a quick stretch, boost the heck out of the saturation to get more color, then run some form of noise reduction software. All this will take you about 30 minutes or so. As you progress you will add steps, stacking will take longer as you get more data, and you will find yourself spending more time in PP than in capturing the image to start with! Ah how we learn. When I first started I could shoot 10 targets in a night, sleep until 1pm, have all 10 targets posted on my website by 3pm. Oh how those images stunk. Now I shoot one, maybe two targets in a full night, then spend days processing them, and they are a little better, heh.

You have heard me mention stretching several times. This needs a little explanation and what follows is a very rough example. There are two ways to “stretch” an image, levels and curves, lets start with levels. In an image editing application you have something usually called levels, in other apps you use a histogram tool. These usually have three pointers near the bottom of the histogram that represent shadows, midtones and highlights as shown below:

C:\Users\Allan\Documents\Astronomy\astro2-07.jpg

Figure(11). Levels window in Photoshop.

What we want to do to “stretch” the image is move the left most pointer (on the top histogram under the number zero) which is the one for the shadows as far to the right as we can without “clipping” any data. What this means is to move that slider to the right until just before you get to where the line in the histogram moves up for the spike.

C:\Users\Allan\Documents\Astronomy\astro2-08.jpg

Figure(12). Adjusting levels for shadows.

Next we want to move the second, center pointer to the left until we get more detail out of the image. Be careful not to move it too far or the background will get too bright. Keep doing this back and forth until you get the best balance of object detail, dark background and least objectionable noise levels. Do not touch the right slider which is the highlight slider.

C:\Users\Allan\Documents\Astronomy\astro2-09.jpg

Figure(13). Adjusting levels for midtones.

The second method of stretching involves curves. This is a little more complex and should be done in very small increments or it can generate a lot of noise and artifacts in your image. Normally I would do this in Photoshop and create a new layer every time I wanted to apply a curves adjustment.

Basically you will see something similar to the screen below (in Photoshop create a new layer by copying the background, then select Image, Adjustments, Curves):

C:\Users\Allan\Documents\Astronomy\astro2-10.jpg

Figure(14). Photoshop curves adjustment window.

Hold down the Ctrl key on the keyboard, click on the darkest part of the background sky you can find, this is your black point. While still holding the Ctrl key down click on the brightest white star you can find, this is your white point. Now still holding the Ctrl key down click on part of the nebula or galaxy you are trying to enhance. Release the control key and press the Up arrow key on the keyboard several times. What you want is to get a small, but obvious increase in brightness/clarity of the section you are working on. Once you get this small adjustment, close the curves window by clicking OK, copy that layer to a new layer, and repeat the process. Using small steps provides the best results because you can reevaluate what area you want to stretch and get better detail. You can also realize when you mess up and just delete that layer without undoing everything you worked on.

Back before I started using a dedicated AP PP app I would sometimes use a combination of levels and curves adjustments to each image to maximize my results. Rarely did only one method provide superior results to a combination approach.

Lets assume that you want to start out with Photoshop and DSS and not use a dedicated AP PP app. You will probably need a little help with gradient removal, noise reduction and other astronomy specific issues. The answer to your prayers is a package called Astronomy Tools Action Set ($21.95 Windows/Mac) which contains tools for all this and much more. While I do not feel this package comes anywhere near the ability of a dedicated AP PP app, it does indeed bridge the gap and I still find myself using it occasionally for final touchups. I have also heard of other such plugins but am not familiar with them.

Section 9: Finding targets, session planning

Now that you have the knowledge and tools to capture and process images, how do you find them? How do you know when you can shoot what target? Excellent questions! To use a phrase from Apple, there’s an app for that!

I use a program called AstroPlanner ($45 Mac/Windows). This software allows me to set a date, select tons of different catalogs to search, search for specific object types, specific rise/transit/set times, specific magnitudes (or anything my scope can see after telling it my telescope type), from specific locations and load all the results (from a few to many thousands) and sort them by pretty much anything you could think of, up to three sort items per list at one time.

It can show me where in the sky each object is, can download images of all the objects in the list so I can actually “see” what I am looking for, print out everything from short little lists to detailed finder charts with multiple levels of details on multiple angles of view. Heck, I can even tell it to slew my telescope to the targets!

You should not have a problem finding what you want because AstroPlanner has access to 132 catalogs which contain some 710,000,000 objects. Eventually I may upgrade to another package like SkyTools Pro, but for the foreseeable future, this program should keep me busy for many years.

Another package that does roughly the same thing is Deep-Sky Planner ($65 Windows) which has a slightly larger catalog at 1 million objects and tighter integration with planetarium programs.

The most expensive package I have seen is SkyTools ($99-$179 Windows) which incorporates many more objects, including 500+ million stars down to 20th magnitude and many features aimed at visual observers such as difficulty ratings for splitting doubles. It even includes some exposure calculations for AP although I would personally take those with a grain of salt.

Don’t confuse these apps with features in smaller apps that show you what targets are up tonight. Some of these only include targets that can be seen visually with a small scope, some of them are limited to Meisser objects only, and some do not allow any searching or sorting. Most of them will not print out detailed finder charts.

I am sure there are many more planning apps, maybe even some that are free. I have tried to provide information on ones I have actually seen people use instead of just blasting out a list of software no one actually uses for anything.

Since I typically will spend an entire night, from sunset to sunrise, imaging, I tend to plan far in advance. Before a new month arrives I will typically use AstroPlanner and TheSkyX to locate targets I want to image, then I make an Excel spreadsheet containing several “target packages” which are all night sessions planned as to what time I will start imaging what target, when I will switch targets, times for meridian flips, etc. In addition I include alternate targets and fun small targets if I have a short amount of time to do something while waiting for something else.

What this allows me to do is have roughly four full nights of targets planned and many alternates in case I can not shoot the primaries for whatever reason (I have had nights where everything to the east was covered in clouds but the west was clear as could be) already printed out, inside a clear sleeve (dew kills paper you know) and in my laptop bag ready to go. So when a clear night good for imaging arrives, I do not have to waste time making lists or hunting for targets, I just grab and go!

You will find that when doing serious long exposure AP work planning your sessions becomes crucial. You need to be aware of meridian flips, plan enough time to reacquire and recenter your target after a flip, plan for time to do flats immediately after taking lights of a specific target and much more. It will take you a while to get everything ironed out but once you do, you can spend your time waiting for a run to finish watching TV on your tablet, doing visual with a second scope (what? I failed to mention you should have a second scope? LOL!), or chatting with other people out imaging with you.

Section 10: Astrophotography with camera lenses

Once in a while you might want to capture a larger expanse of the sky than your telescope will allow and it occurs to you that you could just bolt your camera and lens to your mount or telescope and take long exposures that way. Absolutely!

Many of the same things you learned about taking long exposures through your telescope remain exactly the same, the one big difference is that with your camera lens you can set an f-stop whereas on your telescope your f-ratio is not adjustable. Most people will tell you to open the lens up to its maximum opening, or smallest f-stop number. For some lenses this could be f/1.8, for others, f/2.8, still others may have a maximum of f/4 or f/5.6, The problem with this statement is that these people are obviously not photographers, photographers would tell you to never do that unless you have no choice. The only time a photographer uses the maximum aperture on a lens is where you want to provide maximum separation from the background (small aperture numbers allow for very narrow depth of field, or very little in focus) or when the light is so low they have no choice to stop action like in night sports.

The problem here is that the further you open a lens up towards its maximum the less focused the image becomes. Any lens with a maximum aperture of f/1.8 will be “softer” at f/1.8 than at f/4. It is the maximum of the lens that is the concern, not the actual aperture number. So a lens with a maximum aperture of f/1.8 will be far sharper at f/4 than a lens who’s maximum aperture is f/4 shot at f/4. Make sense?

There is another side to this of course. Once you pass f11 or so on most lenses you start to get what is called diffraction which again, starts to blur the image. Lenses are typically sharpest right in the middle of their range. So if we assume that a lens has the marked aperture settings of 2.8, 4, 5.6, 8, 11, and 16 either f/5.6 or f/8 would be the sharpest the lens could be. Generally speaking opening up to f/4 on this lens would not be too bad so you could use it if you like.

So why should you care about sharpness? Simple, if you don’t care about sharpness, why are you worried about focusing? That is what focusing is, it brings the image together to make it sharper, more defined. Unfocused stars are no longer sharp little points of light, just like lenses shot at their maximum aperture. Stars are so far away they appear as points of light, knocking them out of focus or shooting at an incorrect aperture makes them swell up like blowfish.

Another thing to remember when using your camera and lens on your telescope is to make sure the entire assembly is balanced together. I have seen people balance their scope and get all set up, then bolt a DSLR and huge lens to the top and then wonder why the mount isn’t tracking correctly. Well DUH!

Next we have the issue of focusing. Many camera lenses will actually let you focus past infinity. Since infinity is… well… infinite, you can see where this is a bit of a conundrum. The trick is to disable autofocus and use your live view to zoom in as far as you can (do NOT zoom your lens if using a zoom lens, leave it where you want it to take the pictures, lens zoom can change focus!) and focus by making the stars as small as possible. Once this is done, make sure you do not touch the focusing ring on your lens and start shooting.

Lastly I want to touch on something else a non-photographer would probably overlook. Large lenses attached to camera bodies should not be mounted on a telescope, or a mount, by a tripod thread to the body. The problem is that most cameras today have plastic outer shells including where the tripod mounts, and maybe even the lens mount. When you mount a large heavy lens to it and then support only the camera body from the tripod socket you are just asking for something to break. Most large lenses come with a tripod collar that has a socket for mounting onto a tripod, use that instead of the one on the camera.

Section 11: Brand specific DSLR considerations

There are many different brands of DSLRs including Canon, Minolta, Nikon, Olympus, Pentax, Sony and others. You will see a lot of people using Canons, followed closely by Nikons. Canons clearly have the most software support for astrophotography, and you will hear many people say you should only consider Canons for this reason. Well, do you base your car buying decisions on what make of car your auto parts store has the most parts for? Do you even have a clue as to what make that is? Thought not.

You can shoot with any brand of camera you happen to own, there are however some considerations for different manufacturers.

The first one that jumps out is Sony. They have had some issues with what is called Amp Glow. What this means is the camera picks up light from what looks like the imaging sensor itself glowing. It usually starts in one corner and quickly spreads over the entire image area. This kind of gradient can be very difficult to remove. Amp glow can be minimized by taking shorter exposures and making sure you take flats. I would not purchase a Sony camera if I knew I was going to do some AP work but if you already have one you can mitigate some of the issues.

Nikon cameras have an issue in that unless you purchase a special adapter you are limited to 30 second exposures. Shoestring Astronomy has both USB (preferred) and IR (lower end cameras) links that allow for bulb capabilities for any length exposures. If you are purchasing the camera for AP work, or AP in addition to regular photos, I would suggest a D5000 or higher (D5100, D5200, etc), D90 or D7000. The D300/D300s, D700/D800 and D3/D4 series all work as well but are far more expensive with no real gains for AP work. Older Nikon bodies are not really recommended as their light sensitivity coupled with other processing factors make them less than idea, like most older cameras from other manufacturers.

As for other manufacturers I have heard nothing negative. What you need to check is first, if the processing software you want to use can handle the raw files for that camera. Then, can you find a T-Ring for that brand. Next is can some camera control software like Images Plus or MaximDL run the exposures of the camera. Then I would check with other people using that brand of camera and see if there are any known issues.

If I was purchasing a camera now and had both regular photography and AP in mind I would go pick up something like the Canon 60D and the Nikon D5200 and play with both of them, go through the menus, take a few shots and see which one “called my name”. Either one would be excellent for both tasks so the main concern is how well you will like using it and how comfortable it is to you.

If I was purchasing a camera specifically for AP and nothing else, and had nothing to start with, honestly I would probably go with a CCD instead of a DSLR. There are some great little CCD cameras out there like the Orion G3 series in either color or monochrome you can get for $499. For that price you get a cooled camera which can greatly decrease noise in your images, it is already “modified” so it has great response to Ha and SII, and it is smaller and lighter than a DSLR.