
What is telescope collimation?
Telescope collimation refers to the process of aligning the optical components of a telescope to ensure precise focus and accurate viewing. It involves adjusting the alignment of the mirrors or lenses within the telescope to eliminate any misalignments or aberrations that may affect the clarity of the images produced. Collimating a telescope is an essential skill for any amateur astronomer as it directly impacts the quality of observations.
Why is telescope collimation important?
Proper telescope collimation is crucial for achieving optimal performance and maximizing the potential of your telescope. When the optical components are correctly aligned, the telescope can focus light effectively, resulting in brighter, sharper, and clearer images. Without collimation, the images may appear dim, blurred, out of focus, or distorted, making it challenging to observe celestial objects accurately.
Additionally, collimation plays a significant role in the overall accuracy of a telescope. Misalignment of the mirrors or lenses can introduce optical errors such as astigmatism or coma, which can significantly impact the quality of the images. By regularly collimating your telescope, you can ensure that it is always performing at its best and provide yourself with the opportunity to truly appreciate the wonders of the night sky.
Signs that your telescope needs collimation
It is essential to recognize the signs that indicate your telescope requires collimation. Here are a few common indicators:
- Blurred or fuzzy images: If the images produced by your telescope appear out of focus, even after adjusting the focus knob, it may be a sign of misaligned optics that require collimation.
- Astigmatism or coma: If you notice that stars appear distorted, elongated, or shaped like comets rather than crisp points of light, it may be an indication that your telescope’s optics need to be collimated.
- Uneven or dim images: When observing celestial objects, if you notice that the brightness or sharpness of the image varies across the field of view, it could be a result of misaligned optics that need collimation.
- Difficulty in achieving high magnification: If you find it challenging to achieve high magnification without the image becoming blurry or distorted, collimation may be necessary to correct the alignment of the optical components.
Why do I have to collimate my telescope?
You may be asking why you have to collimate the telescope, why do they not just adjust it at the factory? In most cases, they do. Unfortunately, a lot of things can change the collimation. Since the mirrors need to be exactly aligned and they are very heavy compared to the rest of the telescope, it doesn’t take much for them to become misaligned.
- Movement: Even if you are very careful moving your telescope around, the shift in weight (particularly with the primary mirror) can stress items and cause the alignment to shift slightly. This effect is worse on less expensive telescopes and on larger telescopes.
- Temperature: Large temperature changes can cause components of the telescope to expand and contract, which changes the alignment of the mirrors. This is why experienced telescope users will often collimate their telescopes several times during an all-night viewing or imaging session.
- Use: Just using the telescope can cause things to move around, and given the accuracy needed to keep the best quality image, over time this can cause things to become misaligned.
Do I need to collimate my refractor telescope?
If you own a refractor, you are very likely to never have to collimate it. In fact, it is unlikely that you could collimate it even if you wanted to as they are rarely adjustable. Most of the time the telescope is collimated at the factory and the lenses are glued or otherwise permanently affixed to the tube so they can not be adjusted.
Refractors have a straight light path through a single tube so it is much easier to just line them up and permanently mount everything. Since everything is affixed in a single straight tube, everything expands and contracts at the same rate keeping the collimation the same.
Higher-end refractors may have lens ‘cells’ (all the lenses are fused together in a module and that module can be moved around in the telescope tube) and these cells may be adjustable but they are very rarely collimated by the end-user.
Different methods of telescope collimation
There are several methods available for collimating a telescope, and the choice of method depends on the type of telescope you own and your personal preference. Here are some common methods:
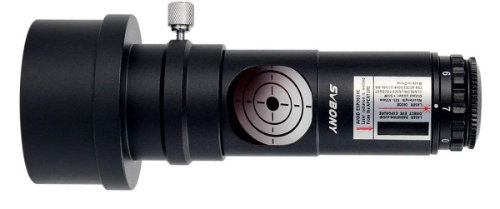
- Collimation using a Cheshire eyepiece: A Cheshire eyepiece is a specialized tool designed for telescope collimation. It consists of a tube with a peephole and a reflective surface. By inserting the Cheshire eyepiece into the focuser and adjusting the telescope’s primary and secondary mirrors, you can achieve proper collimation. This is the “old-school” approach and has been replaced almost completely with the laser collimator.
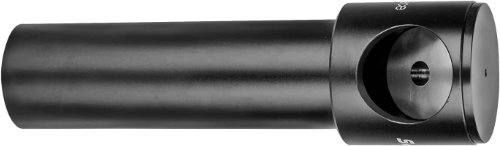
- Laser collimation: Laser collimators are popular tools for collimating telescopes. They emit a laser beam that helps align the optical components. By following the laser beam’s reflection and making necessary adjustments, you can achieve precise collimation. This is the most popular method as it is fast, cheap, and easy. It also can be done in the garage while it is pouring down rain.
- Autocollimation: Autocollimation involves using an autocollimator, which is a device that combines a light source and a collimating lens. The autocollimator allows you to observe the image of the primary mirror and make adjustments accordingly.
- Star collimation: Star collimation involves observing a bright star through the telescope and adjusting the mirrors or lenses until the star appears as a perfect point of light. This method requires patience and clear skies, making it more suitable for experienced observers. We will talk about this later as a “star test”.
Step-by-step guide on how to collimate a telescope
Collimating a telescope may seem daunting at first, but with practice and patience, it becomes a straightforward process. Here is a step-by-step guide to help you collimate your telescope:
- Understand your telescope: Familiarize yourself with the specific collimation adjustments your telescope requires. Refer to the telescope’s user manual or online resources for detailed instructions. Most of the time you will be collimating a Newtonian which will have adjustment screws/knobs on the spider vane mount, and on the very rear of the telescope. Many rear adjustments have two sets of screws/knobs, one for locking and another for the actual adjustments.
- Prepare your tools: Gather the necessary tools for collimation, which may include a Cheshire eyepiece, laser collimator, autocollimator, or any other method-specific tools. Ensure they are working correctly, including checking the batteries. Check to see what specific tools you may need to adjust the screws/knobs.
- Choose a suitable location: Find a solid place to place your telescope so that you can access both sets of adjustment screws/knobs. If using a Cheshire eyepiece or laser collimator, you can do this inside. For collimating using the stars, of course, you will need clear dark skies.
- Align the primary mirror: If your telescope has a primary mirror (the biggest, near the rear of the telescope), start by adjusting its position. Follow the specific instructions for your telescope model, making small adjustments until the mirror is properly aligned. This one adjustment tends to handle 90% of the adjustments I need on a regular basis.
- Check the centering of the secondary mirror: Most Newtonian telescopes have spider vanes that hold the secondary mirror in the center of the tube (check your manual or with the manufacturer, if it seems the secondary is offset intentionally). Many of these you can adjust with screws/knobs on the side of the telescope tube. Use a ruler to measure the distance between the secondary mirror and the side of the telescope tube and make adjustments as necessary to ensure the secondary mirror is centered in the tube.
- Collimate the secondary mirror: Next, focus on collimating the secondary mirror, again referring to the instructions for your telescope. Use the chosen collimation method to align the secondary mirror accurately.
- Fine-tune the collimation: Once the primary and secondary mirrors are aligned, fine-tune the collimation by making small adjustments until the laser is dead center, or until images appear sharp and well-focused.
- Verify collimation: To confirm that your telescope is properly collimated, observe a distant object or a bright star. If the images appear clear and well-defined, you have successfully collimated your telescope.
Common mistakes to avoid when collimating a telescope
While collimating a telescope may seem straightforward, there are some common mistakes that beginners often make. Here are a few to avoid:
- Making large adjustments: When collimating, it is essential to make small, incremental adjustments to the primary and secondary mirrors. Making large adjustments can lead to overcorrection and result in misalignment.
- Neglecting environmental factors: Collimation can be affected by environmental factors such as temperature changes, wind, or vibrations. Ensure that you collimate your telescope in a stable environment to minimize these factors’ impact.
- Not checking collimation regularly: It is crucial to regularly check and maintain your telescope’s collimation. Over time, vibrations, transportation, or other factors can cause misalignments. Regularly verifying collimation ensures that your telescope is always performing optimally.
- Ignoring proper tool usage: Each collimation tool has specific instructions for use. Failing to follow the instructions or misusing the tools can result in inaccurate collimation. Take the time to understand how each tool should be used correctly.
By being aware of these common mistakes and avoiding them, you can ensure that your collimation efforts yield accurate and satisfying results.
Using a Star Test to verify collimation
Once you think your collimation is correct there is an excellent way to test and see if that is the case, a star test. This is the same procedure that advanced users can use to collimate their telescope without a collimator but here we are using it just to verify our work.
- Find a clear, still night and let the telescope cool down to the ambient temperature outside, this can take several hours for a Dobsonian or large Newtonian.
- Find a bright star in the sky such as Polaris and using a low-power eyepiece center it in your field of view.
- Switch to a very high-power eyepiece (preferably at least 25x per inch of aperture) and defocus just a tiny little bit.
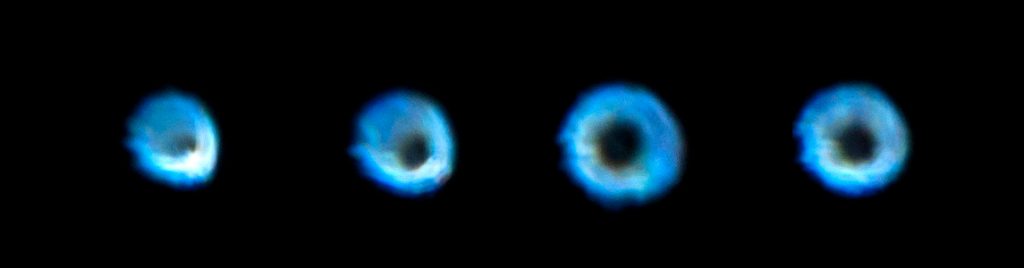
- Ideally, you should see several concentric rings appear around the central point of your star, these rings should be perfectly round and centered. If the center is not perfectly in the center then your collimation is out of adjustment.

One note here is that different telescopes, different magnifications, and different amounts of defocusing will produce slightly different-looking images so do not panic if your results do not exactly match these.
You can adjust your collimation using this method but you must make sure to make extremely small adjustments or the star will jump out of your field of view. You must also make these adjustments quickly if your mount is not tracking. While this works and can achieve very accurate results, I do not recommend it for normal collimation because it takes a lot of practice to use this method without becoming frustrated.
If your defocused pattern looks more like a supernova explosion than concentric rings, then you have too much atmospheric turbulence to perform the star test.
Lastly, if your pattern looks overall like a triangle or heart shape, then your mirror is stressed which can be caused by something being too tight such as the collimation adjustment screws/knobs (or the locking screws/knobs), or your tube rings could be too tight.
Tips for maintaining a collimated telescope
Once you have successfully collimated your telescope, it is important to maintain its collimation for optimal performance. Here are some tips to help you maintain a collimated telescope:
- Handle with care: Treat your telescope with care to avoid any accidental misalignments. Avoid rough handling or sudden movements that may disturb the collimation.
- Transportation precautions: When transporting your telescope, secure it properly and take precautions to minimize vibrations. Use padded cases or protective covers to safeguard the optical components. Be sure telescopes are on something soft and forgiving like your car seats instead of in the trunk.
- Regular checks: Periodically check your telescope’s collimation, especially after transportation or prolonged storage. A quick verification ensures that your telescope is ready for observing sessions and if necessary, small adjustments are much faster and easier than larger ones.
- Calibrate your tools: If you are using collimation tools, such as a laser collimator or Cheshire eyepiece, regularly calibrate them to maintain their accuracy. Follow the manufacturer’s instructions for calibration procedures. Do not store batteries in laser collimators and be sure to check them before heading out to use your telescope.
- Keep your telescope clean: Dust or debris on the mirrors or lenses can affect collimation. Clean them carefully using appropriate cleaning methods and tools to ensure optimal performance. Above all, keep everything covered.
By incorporating these maintenance tips into your routine, you can enjoy consistently clear and sharp views through your telescope.
Conclusion
Collimating a telescope is an essential skill for any amateur astronomer. By mastering the art of telescope collimation, you can ensure that your telescope performs optimally, providing bright, clear, and detailed views of the night sky. Understanding the importance of collimation, recognizing the signs that your telescope needs collimation, and following the step-by-step guide can help you achieve accurate alignment of your telescope’s optical components.
Remember to choose the right collimation method for your telescope, gather the necessary tools, and avoid common mistakes. I highly recommend a laser collimator as it is inexpensive, fast, easy, and accurate.
Regularly maintain the collimation of your telescope, handle it with care, and calibrate your tools for accurate results.
Mastering the art of telescope collimation is a journey that requires practice and patience. By dedicating time to collimating your telescope, you can unlock its full potential and embark on an incredible journey of observing the wonders of the universe. So grab your telescope, follow the steps, and enjoy the breathtaking views that await you. Happy collimating!
Master telescope collimation today and experience the wonders of the night sky with the brightest crystal-clear images your telescope is capable of!