

When leaning how to read a star map remember star maps have fascinated humans for over 10,000 years. From ancient cave drawings to the digital charts we use today, our interest in finding our way around the night sky hasn’t changed a bit.
I’ve spent countless nights staring upward with various star charts in hand, and I can tell you that learning to read one properly opens up an entirely new world. Whether you’re just curious about the cosmos or seriously thinking about astronomy as a hobby, knowing how to use a star map is your ticket to exploring what’s above us.
The night sky contains 88 official constellations and more celestial objects than you could count in a lifetime. Most beginners look at a star chart for the first time and see nothing but a confusing jumble of dots and lines. Don’t worry – that’s completely normal! Our ancestors figured this stuff out without fancy equipment, and you can too with some straightforward guidance.
Star maps can seem intimidating at first glance. I remember my first time trying to match what I saw overhead with what was on paper – frustrating doesn’t begin to describe it! But stick with me, and I’ll walk you through everything from understanding those brightness indicators (the different-sized dots) to finding your first constellations.
Ready to decode the mysteries right above your head? Let’s jump into the world of star maps and get you navigating the night sky like you’ve been doing it for years!
Understanding Star Map Basics
Star maps are our windows to the universe above us. Just like a road map (or Google Maps) helps you find your way around an unfamiliar city, star charts help you navigate the vast celestial sphere over our heads.
What is a star map?
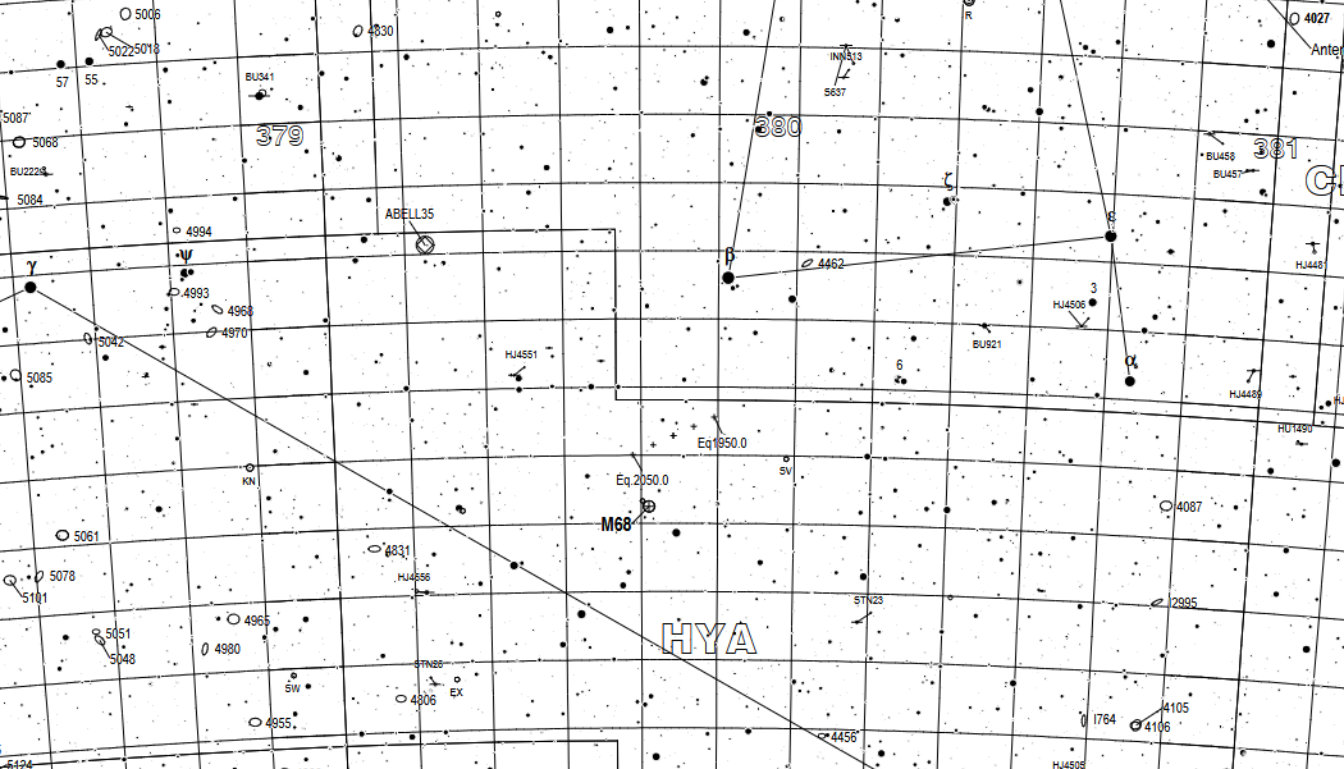
A star map is simply a celestial map that shows stars, constellations, and other objects in the night sky in an organized way. These maps take the three-dimensional dome of the sky and flatten it onto a two-dimensional surface using grid lines that represent celestial latitude and longitude.
I’ve used dozens of different star maps over the years, and the good ones share some common features. They typically show only the brightest stars and deep-sky objects you can actually see without a telescope under dark skies. Most use black dots on a white background which makes them easier to read at night, with bigger dots representing brighter stars. Besides just stars, these maps usually include different symbols for:
- Gray circles for star clusters
- Oval shapes showing galaxies
- Outlined or gray areas indicating the Milky Way
- Grid lines for finding exact locations
Star maps aren’t fixed forever. They change to account for Earth’s rotation, our orbit around the Sun, and even the slow wobble of Earth’s axis (something called axial precession).
Different types of star maps
Throughout my years of stargazing, I’ve collected several different types of star maps, each with its own advantages:

Planispheres such as the Guide to the Stars shown above are my go-to for quick reference. These rotating star wheels let you dial in the date and time to see exactly what’s visible in your sky right then. Simply adjust the dial, and it shows which constellations will be above you. The best thing about planispheres is they work based on your local time – you just need to make sure you get one designed for your latitude.

Star atlases are much more detailed. I have several including the Sky Atlas 2000.0 Laminated Field Edition by Wil Tirion, which shows far more stars than you’d ever see with just your eyes. The Cambridge Star Atlas and interstellarum Deep Sky Atlas are also excellent options. These books contain multiple charts ranging from big-picture seasonal views to close-ups of specific constellation regions. You can even download and print your own with the excellent TriAtlas project by José Ramón Torres and Casey Skelton. Their website is sadly no longer available but Allan Hall has graciously provided an almost complete mirror of the website.

Monthly charts give you a snapshot of what’s visible during specific months of the year. I find these perfect for beginners just learning their way around seasonal patterns in the sky. Shown above is The Monthly Sky Guide which is co-authored by Wil Tirion who is involved with a lot of the best sky charts available in any format.
Physical vs. digital star maps
We now have both paper and digital options available. Each has its own strengths.
Physical paper maps have been my mainstay for years. They never run out of batteries in the field, which is a huge plus on long nights. I can mark them up with notes and observations too. One of the biggest advantages is being able to read them with a red flashlight without ruining my night vision. That’s crucial when you’re out under dark skies.
Digital star maps have their place in my kit as well. Apps like Stellarium (my favorite for beginners on the computer), SkyChart, and Sky Safari Pro (my favorite on my phone and tablet) let you explore the sky from anywhere. The major advantage here is they can show “moving” objects like the Moon, planets, and asteroids in real-time. Point your phone at the sky, and they’ll tell you exactly what you’re looking at.
I actually use both types depending on the situation. For planning sessions at home, I’ll often spread out a physical atlas on the table. But when I’m actually at the telescope, I might quickly check a digital app to confirm what I’m seeing. It’s not an either-or choice for most serious stargazers.
Decoding Star Map Symbols
Once you understand the symbols on a star map, everything changes. What looked like a random collection of dots and lines suddenly becomes an organized map of the heavens. I remember my first time successfully matching star patterns on paper to what I saw overhead – it felt like cracking a secret code!
Star brightness and magnitude scale
The different-sized dots on a star map tell you one critical thing – how bright each star appears from Earth. Even though all stars look like points of light when we look up, star maps use various dot sizes to show their relative brightness. This brightness is measured using the magnitude scale, which has some pretty interesting history behind it.
The magnitude system we use today comes from ancient astronomers like Hipparchus and Ptolemy, who grouped stars into six categories of brightness. The funny thing is, this scale works backwards from what you’d expect – the lower the magnitude number, the brighter the star! The brightest stars are magnitude 1, while the faintest visible to the naked eye are magnitude 6.
Modern astronomers made this system more precise. A first-magnitude star shines exactly 100 times brighter than a sixth-magnitude star. Each step of one magnitude represents a brightness difference of about 2.512 times. The scale now extends beyond the original 1-6 range, with super-bright objects getting negative values. For example:
- The Sun: magnitude -26.7
- Full Moon: about -11
- Sirius (brightest star): -1.46
- Limit of what most people can see: magnitude 6
I find this backwards system confusing sometimes even after years of using it. Just remember: smaller number means brighter star.
Constellation lines and boundaries
Star maps connect the dots between stars to form the stick-figure outlines of constellations. These lines help us recognize patterns like Orion or the Big Dipper. I always have to remind people that these lines don’t actually exist in space – they’re just human inventions to help us remember star patterns.
Beyond these connecting lines, you’ll also see thin lines marking official constellation boundaries. These aren’t just made up – they’re formal borders established by the International Astronomical Union back in 1930. These boundaries divide the entire sky into 88 official constellations, with 36 mainly in the northern sky and 52 in the southern hemisphere.
Deep sky object symbols
Star maps use different symbols for objects beyond just stars. These symbols help astronomers find nebulae, galaxies, and star clusters. When I first started using detailed star charts, these symbols confused me until I learned the common ones:
- Open star clusters: dotted circles
- Globular star clusters: circles with a “plus” symbol
- Planetary nebulae: special unique symbols
- Elliptical galaxies: elliptical shapes
- Spiral galaxies: spiral-shaped symbols
- Diffuse nebulae: specific nebula symbols
These symbols represent the thousands of faint objects that telescopes can see but our eyes usually can’t.
Coordinate grid systems
Star maps use a coordinate system just like Earth maps use latitude and longitude. The main system uses right ascension (RA) and declination (Dec).
Declination is basically celestial latitude – it shows the north-south position relative to the celestial equator and is measured in degrees. Objects north of the celestial equator have positive declination values, while those south have negative values.
Right ascension works like celestial longitude, measured eastward from a reference point called the vernal equinox. The weird thing is that instead of degrees, RA uses hours (h), minutes (m), and seconds (s). One hour of RA equals 15° of sky rotation – so a complete circle of 24 hours matches the 360° rotation of Earth.
I struggled with this system at first because it seemed needlessly complicated. Why use hours instead of degrees? The answer goes back to how the Earth rotates and how early astronomers measured the sky. Once you get used to it, the system makes finding specific objects much easier. It’s basically like having GPS coordinates for the sky.
Orienting Your Star Map
Getting your star map pointed the right way is the first big challenge you’ll face. I’ve spent many frustrating nights trying to match what’s on my map to what’s overhead, and I can tell you that even the most detailed chart is completely useless if it’s not lined up correctly with your actual view.
Finding north with Polaris
Finding Polaris (the North Star) is the most important first step for getting your bearings. What makes Polaris special is that unlike every other star that appears to move through the night, Polaris stays put. It sits directly above Earth’s north pole along our planet’s rotational axis, so it always points to true north.
Here’s how I find Polaris:
- First, look for the Big Dipper (some people call it the Plough or Saucepan)
- Find the two stars at the end of the Dipper’s “bowl”
- Draw an imaginary line through these two “pointer stars”
- Follow this line about five times the distance between the pointers
- You’ll hit Polaris, which happens to be the last star in the handle of the Little Dipper
Once you’re facing Polaris, you’re facing north—with south behind you, east to your right, and west to your left. Simple!
Aligning your map with the horizon
Star maps show the dome of the sky above you, with the round edges usually representing the horizon. The first few times I tried to use a star map, I had it upside-down without realizing it! Here’s how to avoid that mistake:
- Hold the map overhead with the direction you’re facing at the bottom
- The center of the map is the sky directly above your head (what astronomers call the zenith)
- Turn the map so the compass directions match which way you’re actually standing
- Remember that east and west are flipped on maps when you’re facing south
Most beginners find it easiest to start by facing south (with Polaris at your back), holding the map with “Southern Horizon” at your feet.
Adjusting for date and time
Stars change position throughout the night and look different depending on the season. I learned this the hard way when I first started – I couldn’t figure out why nothing matched until I realized my map was set for the wrong month! You need to set your star map to the current date and time:
- If you’re using a planisphere, rotate the dial until the current date lines up with your current time
- Don’t forget about Daylight Saving Time (subtract one hour if it’s in effect)
- Once set properly, the star pattern on the map should match what you see in the sky
Using a red flashlight for night vision
Our eyes take 20-40 minutes to fully adapt to darkness. This happens because of a light-sensitive compound called rhodopsin in our eyes. The interesting thing is that deep red light doesn’t destroy rhodopsin, so you can read your map without ruining your night vision.
For best stargazing results:
- Use a dim red flashlight to read your map
- Stay away from white lights (including your cell phone screen)
- If you don’t have a red flashlight, make one by covering a regular flashlight with red cellophane or nail polish
I can’t stress this enough – proper orientation transforms your star map from a bewildering jumble of dots and lines into a useful tool for navigating the night sky. When I first started, I spent half my time just trying to figure out which way to hold the map. Now it’s second nature, and it will be for you too with a little practice.
Locating Stars and Constellations
Once you’ve got your map oriented correctly, the real fun begins – finding actual stars and constellations in the sky above you. This is where all that preparation finally pays off.
Starting with bright anchor stars
The bright stars are your friends, especially if you live anywhere near city lights. I use these cosmic landmarks to get my bearings before trying to find anything more challenging. Sirius, the brightest star we can see from Earth, is super easy to locate – just follow Orion’s belt eastward until you hit an unmistakably bright point. I’ve shown this trick to complete beginners and they’re always amazed at how easy it is.
Arcturus is another great anchor star. Just follow the arc of the Big Dipper’s handle away from the bowl, and you’ll run right into it. The blue-white star Vega is part of what we call the Summer Triangle alongside Altair and Deneb. Once you’ve found these bright anchors, finding everything else gets much easier.
Identifying major constellations by season
The night sky changes throughout the year because stars move 90 degrees across the sky every three months. This is why certain constellations are associated with specific seasons:
- Winter: Orion is the king of winter skies with that unmistakable three-star belt. I also look for Canis Major (which has Sirius) and Taurus with its V-shaped head
- Spring: Leo stands out with its sickle-shaped pattern, Virgo shows off bright Spica, and Ursa Major rides high
- Summer: The Summer Triangle formed by the constellations Cygnus, Lyra, and Aquila creates a pattern I can spot even from my light-polluted backyard
- Autumn: Cassiopeia’s W-shape, the Great Square of Pegasus, and Andromeda dominate fall evenings
Some constellations like Ursa Major and Cassiopeia (for northern hemisphere observers like me) are visible year-round because they circle the pole star. Others only show up during their season and then disappear below the horizon for months.
Star hopping techniques
Star hopping is just what it sounds like – the astronomer’s version of connect-the-dots. Instead of trying to find faint objects directly, you use distinctive patterns as stepping stones. I’ve used this method for years, and it’s far more reliable than trying to use coordinates when you’re just starting out.
For example, to find the Andromeda Galaxy, I first locate the Great Square of Pegasus, then count two stars up from the left corner to find my target. This works way better than trying to point your telescope at precise coordinates.
Experienced stargazers use their hands to estimate distances in the sky. Your outstretched hand at arm’s length spans approximately 20 degrees of sky. I use my fist for about 10 degrees and my pinky for about 1 degree.
With practice, this method helps build a mental map of the night sky. What starts as random dots slowly transforms into familiar territory. The first time I successfully star-hopped to find the Ring Nebula in Lyra, I felt like I’d actually learned to navigate the cosmos. You will too.
Finding Planets and Deep Sky Objects
Once you’re comfortable finding stars and constellations, it’s time to hunt for the real treasures – planets and deep sky objects. This is where your stargazing really levels up from casual looking to serious astronomy.
Locating planets along the ecliptic
The ecliptic is basically Earth’s orbital plane around the Sun. You can see it as the path the Sun takes across our sky throughout the year. The cool thing about the ecliptic is that all the major planets orbit in nearly the same plane, with Mercury having the biggest deviation at just 7 degrees. This means you’ll always find planets along or near this invisible highway that runs through the zodiac constellations.
Finding planets using a star map is pretty straightforward:
- Find the ecliptic line on your chart
- Look at the zodiac constellations along this path
- Keep an eye out for bright objects that don’t appear on your fixed star map
I’ve found that planets have a different look than stars. Venus and Jupiter shine like brilliant “stars” but they don’t twinkle the way real stars do. Mars has a distinctive reddish color that’s hard to miss once you know what to look for. Uranus and Neptune are much tougher – I can’t see them without at least binoculars or a small telescope.
Using coordinates to find galaxies and nebulae
Finding deep sky objects like galaxies and nebulae is a bit more challenging. This is where those celestial coordinates I mentioned earlier come into play. Just like Earth uses latitude and longitude, star maps use right ascension (RA) and declination (Dec):
- Right ascension: Measured in hours (1h to 24h), works like longitude
- Declination: Measured in degrees (-90° to +90°), works like latitude
Here’s how I use coordinates: to find something like the Great Orion Nebula (RA: 5h 35m, Dec: -5° 23′), I first locate the RA lines labeled “5h” and “6h” on my map, then follow the Dec line at -5° until I reach the point between those RA lines. The first few times I tried this, I kept getting lost. Now it’s second nature.
Tracking celestial objects across seasons
Unlike stars that stay in their fixed patterns relative to each other, planets are constantly moving through the zodiac at different speeds. Jupiter takes about a year to cross a single zodiac constellation, while speedy Mercury runs through all twelve in just one year.
Planets also change their visibility throughout the year depending on where they are relative to the Sun. For example, Venus sometimes appears as a “morning star” before sunrise, and other times as an “evening star” after sunset. This is where digital star maps really shine – they show you exactly where the planets are on any given night.
I’ve tried to track planets using just paper star charts, and it’s doable but tricky. Much easier to use one of the astronomy magazines or websites that publish monthly “what’s visible” guides. They tell you the best times to see different planets and other interesting objects.
The most exciting moment for me was finding Saturn for the first time in my small telescope. Even though I knew exactly where to look using coordinates, seeing those rings with my own eyes was absolutely mind-blowing. It’s moments like these that make all the effort of learning to navigate the night sky worthwhile.
Conclusions to How to read a star map
Star maps have completely changed how I look at the night sky. What used to be just random points of light overhead have become meaningful patterns and fascinating objects with names, histories, and stories. I truly believe anyone can learn to navigate the celestial sphere with a little patience and the right approach.
Mastering star charts definitely takes practice. Don’t expect to memorize everything in one night! Start with those bright anchor stars I mentioned earlier and the major constellations everyone knows, then gradually work your way toward finding more challenging objects. I still remember my first successful attempt at finding the Andromeda Galaxy – it took me three different nights of trying before I finally spotted that faint fuzzy patch exactly where my map said it should be.
Paper maps work great for basic navigation and learning the constellations. I still use them regularly for planning my observing sessions. Digital tools really shine when tracking planets or other moving objects. The combination of both gives you the best of both worlds.
Let your star map become a trusted friend during your stargazing adventures. There’s something deeply satisfying about standing under a dark sky with just a simple map and your eyes, connecting with the same stars our ancestors used for navigation, storytelling, and understanding their place in the universe. When I’m out under the stars with my map, I feel connected to thousands of years of human sky-watchers who came before me.
Don’t wait for the “perfect” night or equipment. Grab a simple star map tonight and step outside – the stars are waiting for you just like they’ve been waiting for all of humanity throughout our existence.